
Bb Learn Content Areas -- Adding Web Links
Instructions
- Navigate to the content area where you wish to add the Web Link.
A content area in a Bb Learn course section is a webpage that has the "Build Content," "Assessments," "Tools," and "Partner Content" drop-down menus at the top.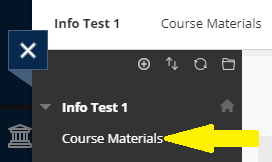
- Click “Build Content.”
- Choose “Web Link.”
- Enter a “Name” for the link.
- Enter the “URL” for the link.
- Skip the “This link is to a Tool Provider” checkbox, if visible. Doesn’t apply to CCI.
- (Optional) Enter a description in the "Text" box.
- If you want, you can attach a file in the "ATTACHMENTS" area, like a related Word document or PDF file, but this isn’t necessary for the link to work.
- Select “Yes” next to “Open in a New Window.” Links in the Firefox internet browser have issues opening in the same window in Bb Learn.
- Select “Yes” next to “Permit Users to View this Content” if you want students to see the link.
- Select “Yes” next to “Track Number of Views” if you want to track how often the link is clicked.
- Fill out the “Select Date and Time Restrictions” section if you want the link to display after and/or until set days and times. If you set dates and times in this area, be sure “Permit Users to View this Content” is set to “Yes” or the link will never be visible.
- Click “Submit.”
- Click the title of the newly added link to make sure it works.
Instructions
- Navigate to the content area where you wish to add the Web Link in a text area.
- Edit or create the Item or content with text.
- To create: click “Build Content," choose “Item" or some other content type.
- To edit: hover over the Item or content, click the circled down arrow next to the Item's or content's name, and click "Edit."
- Enter a “Name” for the link.
- Choose “Color of Name” to choose a different color for the Item Name.
- Enter whatever text you wish in the “Text” box.
- Highlight text with your mouse cursor in the “Text” box. (Keep mouse button pressed while dragging the mouse cursor over text).
- Click the chain link icon in the toolbar.
- In the “Insert/Edit Link” pop-up window, copy and paste the URL into the “Link Path” field.
- In the “Target” drop-down menu, choose “Open in New Window (_blank)”.
- Links in Firefox internet browser have issues opening in the same window.
- Enter a short description in the “Title” field.
- Ignore the “Class” drop-down menu. It has no use here.
- Click “Insert.”
- If you make a mistake in what you hyperlink:
- Highlight the hyperlink with your mouse.
- Click the broken chain link icon or in the “Text” box toolbar.
- Repeat steps 7-12.
- (Optional) Attach one or more files in the "ATTACHMENTS" area.
- Select “Yes” next to “Permit Users to View this Content” if you want students to see the link.
- Ignore “Track Number of Views" (if an Item or unsure).
- (Optional) “Select Date and Time Restrictions” to make the Course Link display after or until a set day/time or days/times.
- If you do this, select "Yes" for “Permit Users to View this Content,” or the link will never be visible.
Click “Submit.”
Click the title of the newly added link to make sure it works.
More Help?
- Navigate to the content area where you wish to add the Web Link in a text area.