
BB Learn Tests -- Creating
Introduction
The instructions below cover creating a Bb Learn test. Bb Learn Tests can automatically grade many types of questions, such as Multiple Choice, True/Fase, Multiple Answer. Ordering, Matching, etc. Bb Learn Tests cannot auto-grade essay, short answer, or file-response questions. For auto-grading, fill in the blank questions may require using the text pattern matching and/or use of regular expression features provided in Bb Learn.
IMPORTANT NOTES -- PLEASE REVIEW!!
Create a Test
A video on Bb Learn test creation and editing is below.
Written step-by-step instructions are below.
Go to a content area where want your test to appear.
The content area will have an "Assessments" drop-down menu at the top.
The content area may not be called "Assignments" in your Bb Learn course shell.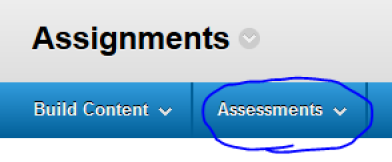
If you don't have such an area in Bb Learn course shell, see:
Bb Learn Content Area -- CreationClick "Assessments." Then click "Test."
"Assignments" may not be the name of the content area where you created your test.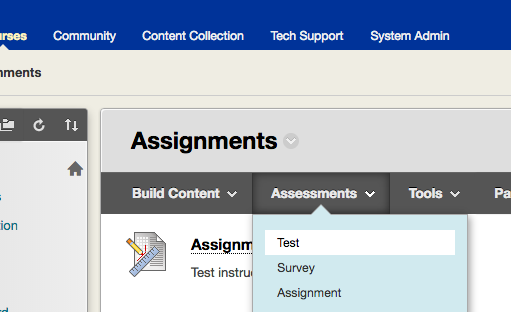
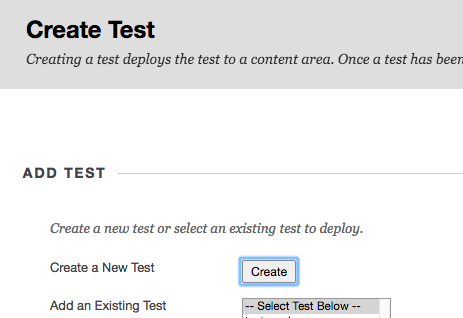
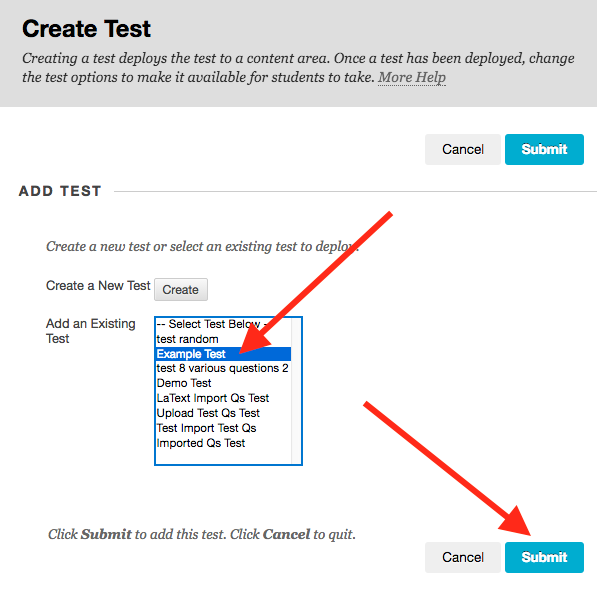
Click "Create" on the "Create Test" webpage.
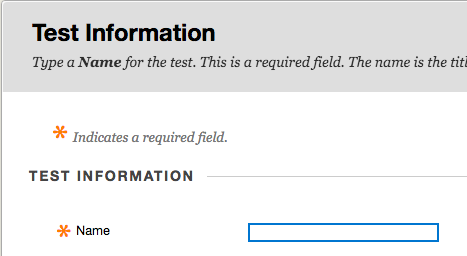
Enter a "Name" for the test on the "Test Information" webpage.
- If you wish, enter a "Description" and "Instructions." (You can add/modify these later.)
These areas appear to students while they take the test.
If you use a File Response question: We recommend noting in one of these areas that "File Response questions always say they are incomplete when a student submits the test/exam, even when a file is attached. The bug has been reported. Disregard notice and submit regardless. The file submission will appear with your exam."
Here is how the "Description" and "Instructions" text areas appear on the "Test Information" webpage.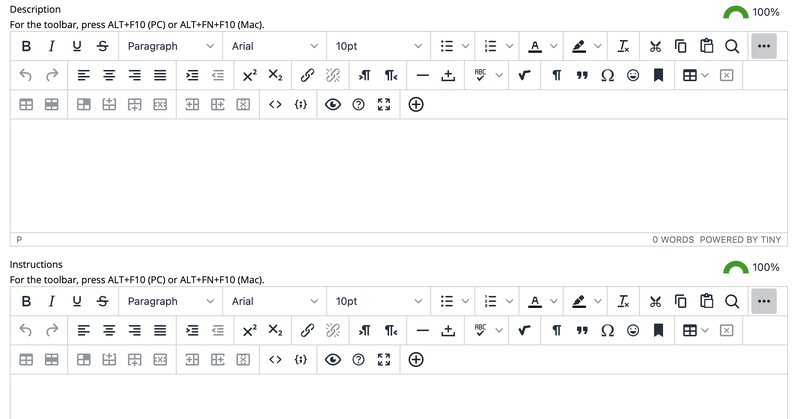
- Click "Submit."
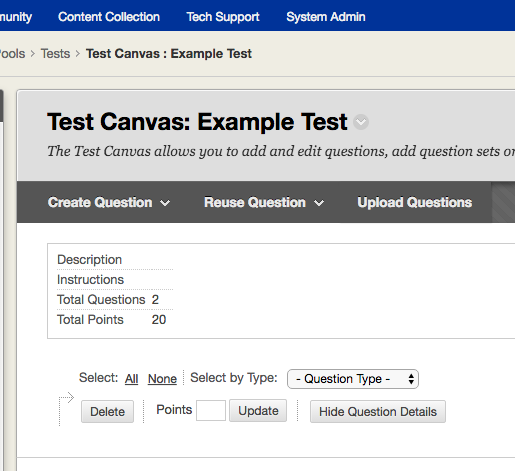
Add questions now on the "Test Canvas" webpage.
Instructions on how to RE-USE questions from another test or a question pool are at:Bb Learn Tests -- Reusing and Randomizing Questions
Or click "Create Question," select a type of question to create, and then follow the onscreen instructions. Multiple Choice or True/False questions are available, and as well as many others.
Information on all question types are at:https://en-us.help.blackboard.com/Learn/Instructor/Tests_Pools_Surveys/040_Question_Types
File Response questions...always say they are incomplete, even when a file is attached, when a student submits. The student can disregard notice and submit regardless, and the file submission will appear with your exam.You will likely have 0 or another number for "Total Questions" and "Total Points."
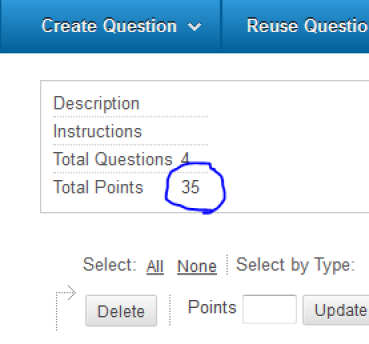
- Change the point value on a question?
- Click the "Points" box number to the right of each question, edit the value, and click "Submit."

The total points for a test are shown at the top of the page.
- Finished adding questions?
You can add more questions later (unless someone has submitted or started the test). - Scroll to the bottom of the screen, and click "OK."
On the "Create Test" webpage, select the new test's name, and click "Submit."
Your test will name a different name.
On the "Test Options" webpage, enter/edit the "Name" for the test.
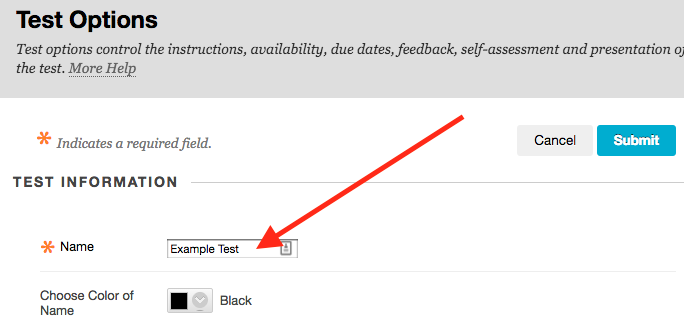
Your test will name a different name.
Enter a "Content Link Description."
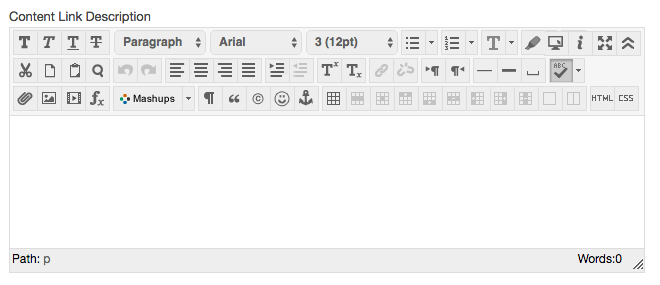
This description appears under the link student's click to access the test.
Scroll down to "TEST AVAILABILITY."
Set "Make the link available" to "Yes."
Even if you set a date/time when the test becomes available/unavailable to students further down.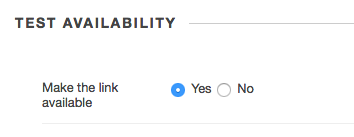
Allow students to submit the test more than once?
Checking "Multiple Attempts" allows students to submit (attempt) the test more than once.
Not checking "Multiple Attempts" is simpler.
But it's fine to allow "Multiple Attempts." Just note the special considerations mentioned below for the "SHOW TEST RESULTS AND FEEDBACK TO STUDENTS."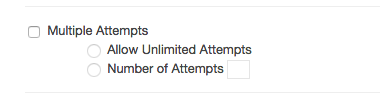
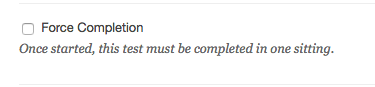
- Do NOT check "Force Completion." Checking "Set Timer" and setting "Auto-Submit" to "ON" will accomplish the same thing.
- With "Force Completion" checked/enabled, if students lose power or internet access, or if their computer crashes, the test will submit, and then this will mean much more work for you and us to rectify the issue.
- Only allow students a set amount of time to take the test?
- Check "Set Timer" if you want students to only have a set amount of time to take a test.
- Enter a number in "Minutes" for the "Timer."
- Set "Auto-Submit" to "ON"
Or you will have to manually grade.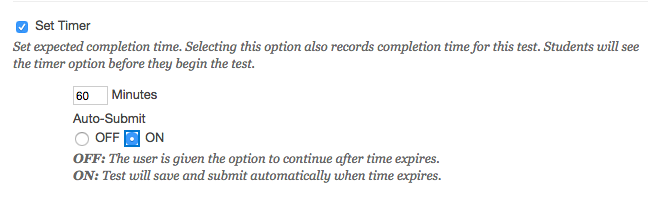
- If you wish, set the "Display After" and/or "Display Until" fields.
This sets when the link to the test becomes available and unavailable to students.
You will have different dates and times.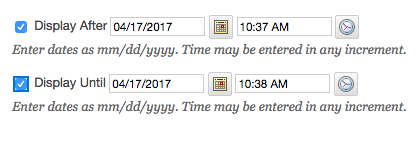
- Set a "Due Date," and check "Do not allow students to start the Test if the due date has passed."
- Otherwise, you may need to manually grade the test,
or put more work into manually grading the test.
You will have different due dates and times.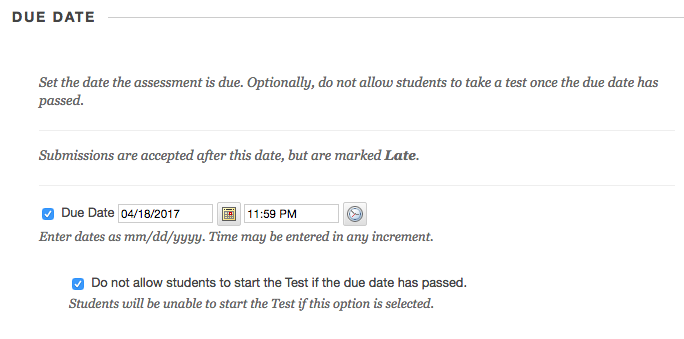
- Scroll down to "SHOW TEST RESULTS AND FEEDBACK TO STUDENTS."
This area governs what students see when they view their test results.
When: governs when students will see the results and/or feedback options offered in this area. (The overall grade in "Full Grade Center" not affected by this.)
Score per Question: shows the student the points they got on each question
All answers: shows the student all the answer choices that were provided on the test for each question.
Correct: shows what the correct answer was for each question (not applicable to short answer, essay, etc.)
Submitted: shows what the student submitted or chose as an answer for a question
Feedback: shows students any pre-set feedback an instructor provided within the test questions
Show Incorrect Questions: shows what the incorrect answers were for each question (not applicable to short answer, essay, etc.)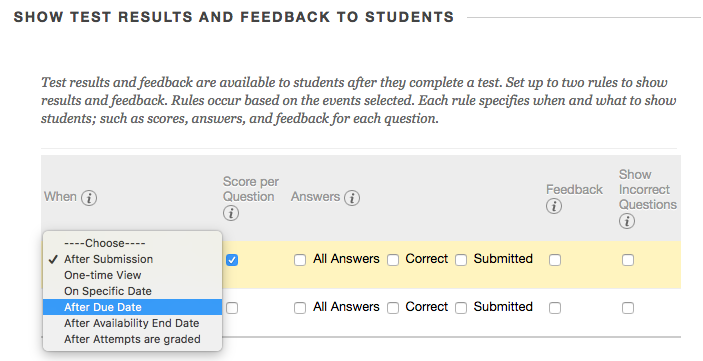
- If you allowed "Multiple Attempts," do the following (VERY IMPORTANT):
Look in the "SHOW TEST RESULTS AND FEEDBACK TO STUDENTS" area.
Set the "When" column drop-down menu to be "After Due Date" or "After Availability End Date" or "After Attempts are Graded."
Be sure to set the top or both "When" column drop-down menus to one of these options.
The "When" option governs when students will see the results and/or feedback options
offered in this area. (The overall grade in "Full Grade Center" not affected by this.) - Once you have set the options for your test, click "Submit."
- If you allowed "Multiple Attempts," do the following (VERY IMPORTANT):
Enter "Full Grade Center" (Click to expand "Grade Center"
in left navigation panel (course menu), and click "Full Grade Center.")
Click the circled down arrow in the top (header) row in this test's column.
Click "Hide from Student View (On/OFF)."
A circle with a line through it will appear in the top row,
hiding the column and grades from students.
Repeat these steps after grading for the test is concluded.
You are done.
Related Links- Editing Tests?
Bb Learn Tests -- Editing - Grading Tests?
Bb Learn Tests -- Grading - Respondus LockDown Browser?
Respondus -- LockDown Browser or Webcam Monitor
Respondus Monitor with webcam?
Respondus -- LockDown Browser or Webcam Monitor - Upload Test Questions from Text File?
Bb Learn Tests -- Upload Test Questions - Respondus 4.0 Test Import from Word?
Respondus 4.0 Campus-Wide -- Test Import from Microsoft Word Tool - Extended Time & Other Exceptions on Tests?
Bb Learn Tests -- Exceptions, or Allowing Students to Take Tests Early or Late, and More - More Test Options?
Bb Learn Tests -- Optional or Advanced Test Options