
QuickTime -- Converting Other Media
Here is how you can use QuickTime to convert other audio, video, or media to another format by screen recording it while it plays on your Mac.
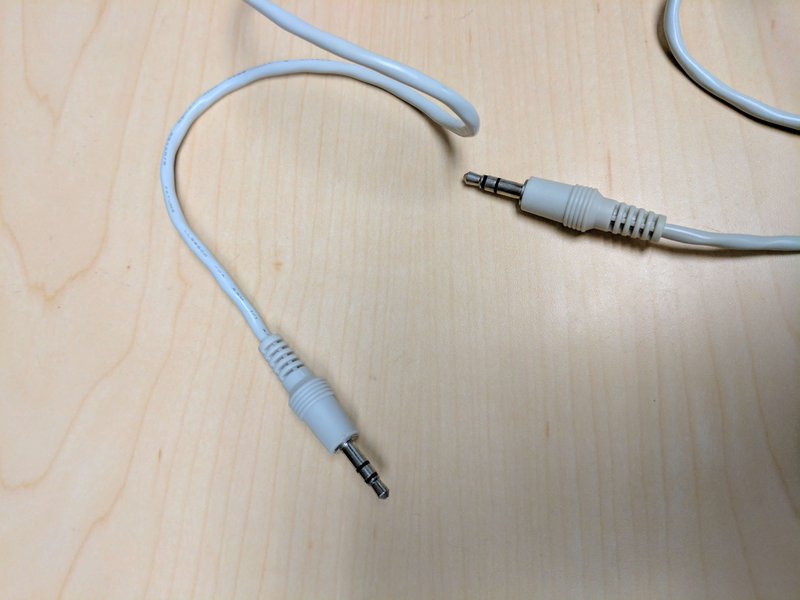
To prevent unwanted audio during the recording, if you have two 3.5 mm audio ports, one for "headphones" ("lineout") and one for "microphone" ("mic" or "linein"), find a 3.5 mm cord with a male plug at both ends, and plug the cord (or plug the plug) into the "headphone" and then the "microphone" ports or jacks on your computer. Make sure your screen recorder is not set to pick up computer audio. Then play the video and see if the screen recorder is picking up audio. Then do a test recording to see how it sounds.
If you don't have a "lineout" and "linein" 3.5 mm audio port on your computer, you can find USB-to-3.5 mm adapters (converters) on Amazon for less than $10 that have .
Here are example images of a 3.5 mm cord with a male plug at both ends.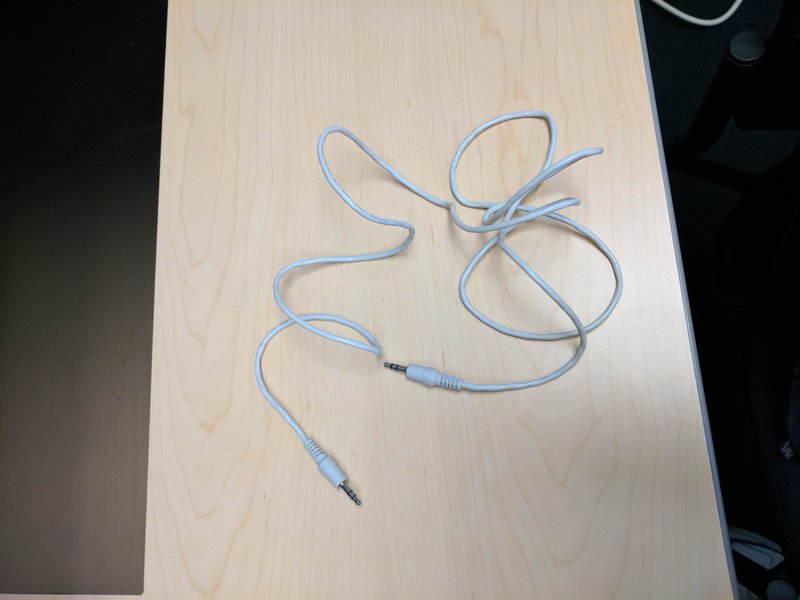
-by-step instructions for making such a screen recording using QuickTime on a Mac are below.
- Review the webpage below for how to screen record with "QuickTime."
- Open the video, audio, or other media on your Mac. Expand the window with this media and the contents of the window as large as possible without losing any wanted visuals.
- Click the green circle in upper left of a window to expand it so that it takes up the entire display.
- To return to the window to normal size, move your mouse pointer to the top of the computer display, and take your hands off your Mac's touch pad or mouse for 2-3 seconds. You'll see the top of the window appear, and then you can click the green circle again.
- You can keep a window maximized but switch between another Window in recent Mac OS or macOS by placing 3 fingers on the touch pad and swiping left on the touchpad. Swipe 3 fingers right to go back to the maximized window.
- Switch between applications using the keyboard:
- Press and hold the ⌘ key (also known as "command" or "cmd"), and then press "tab" once while holding the ⌘ key down.
- The "Application Switcher" window appears.
- While holding the ⌘ key, press the "tab" key one or more times to select an application to the right.
- While holding the ⌘ key, press the ` key one or more times to select an application to the left.
- Switch between multiple open windows for the same application, like an internet browser.
- Press and hold the ⌘ key (also known as "command" or "cmd"), and then press ' one or more times while holding the ⌘ key down to select the desired window.
- Open up the QuickTime application on your Mac.
- If you switch to a different application on your Mac then QuickTime, you'll likely have to open QuickTime again.
- When QuickTime is open, if you right-click the QuickTime icon in the "Dock" or set of icons at the bottom of the Mac computer display, select "Options," and select "Keep in Dock," you can more easily access "QuickTime."
- If a pop-up window for selecting files appears, click "Done" in lower right.
- Click "File" and then "New Screen Recording."
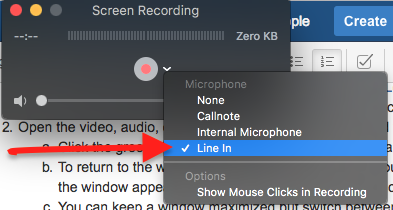
Set the microphone in "QuickTime" to be "Line In."
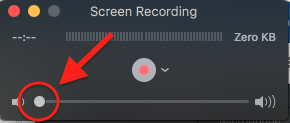
Make sure the volume slider line is slid all the way to the left.
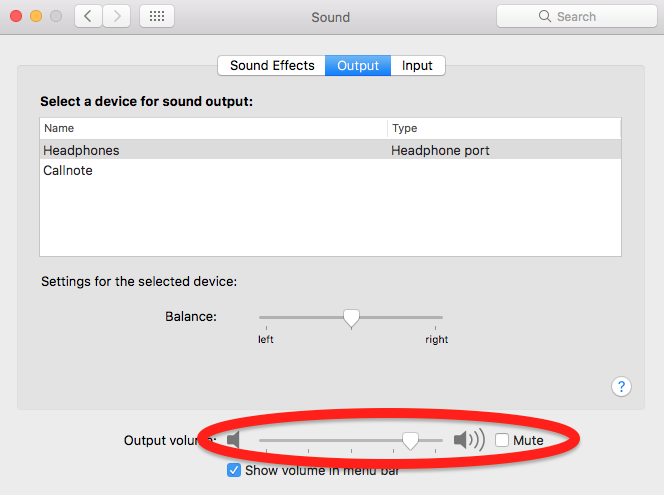
Set your Mac computer's volume to be about 75-80% of maximum.
Click the apple icon in upper left of computer display, select "System Preferences," click "Sound," click "Output," and move the slider accordingly.
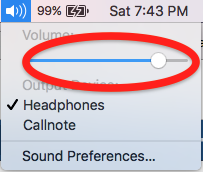
Or click the speaker icon (if available) in upper right of computer display, and move the slider accordingly.
- Find a 3.5 mm cord with a male plug at both ends, and plug the cord (or plug the plug) into the "headphone" and then the "microphone" ports or jacks on your computer.
- Switch to the window with the media and start playing the media or running the media presentation.
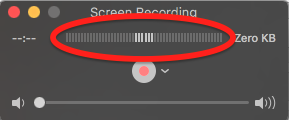
Switch back to the QuickTime window, and check that audio level indicator is moving (meaning that audio is being picked up).
You usually want twice as many white bars appearing on average as shown in the following image.
- Switch to the window with the media, stop playing the media, and set the media back to the beginning.
- Check how long the media will play for.
- Start the recording.
- You may want to just do a test recording for 10-20 seconds first, and see what you get. Then discard the test recording.
- Switch to the window with the media and start playing the media from the start.
- Move your mouse cursor to the far left or right, and as far out of sight as possible.
- Don't move it down or up.
- Set a timer (most mobile devices have them built-in to clock applications with timers) for the length of the recording.
- Wait for the media to play through, and don't do anything else on the computer playing the media.
- When the timer expires, check that the media has finished playing, and stop the screen recording.
- In "QuickTime," use the "Trim" feature under "Edit" and then "Trim" to remove unwanted video from the start and end of the recording.
- Start at the right side, and move the right end of the yellow box right to set where the video will end.
- Note that if you move the slider, and then stop moving the slider without releasing it, QuickTime will "zoom in" so that you can move the slider over much shorter time intervals more easily.
- Move the left end of the yellow box left to set where the video will start.
- If you start on the left, then do the right side, you often have to redo the left side again.
- Note that if you move the slider, and then stop moving the slider without releasing it, QuickTime will "zoom in" so that you can move the slider over much shorter time intervals more easily.
- You can play the video within the yellow box to see what is still included and click different points in the movie timeline.
- Click "Trim" when finished editing start and end of the video.
- Start at the right side, and move the right end of the yellow box right to set where the video will end.
- Save the video where you want with what name you want on your Mac.