
Zoom -- Leave Computer Audio
Introduction
When supporting events or using speakers, we often run the Zoom meeting from the Windows "tiny PC" in the conference room's or classroom's podium or lectern.
Then we have the guest speaker join without audio. Why? So they don't have to connect anything for AV.
But also...This allows other people in the room to present more easily from their own laptops (multiple-presenter scenario). Zoom meetings would otherwise require massive delays between each presentation, disconnecting one speaker's laptop and then connecting another.
CCI Commons Student Assistants (SA's) will ask at the start of a presentation if anyone else needs to present and set them up in Zoom using these instructions.
This page explains how to do this for both new Student Assistants & people running Zoom meetings themselves.
Instructions
There are *7* steps!
- Open the Zoom browser or application & start a Zoom meeting.
- When the meeting starts, a pop-up will prompt you about Computer Audio, click the 'X' icon or close the pop-up.
Windows 10/11 screenshot below.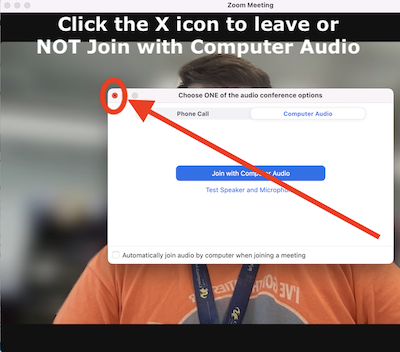
Mac screenshot below.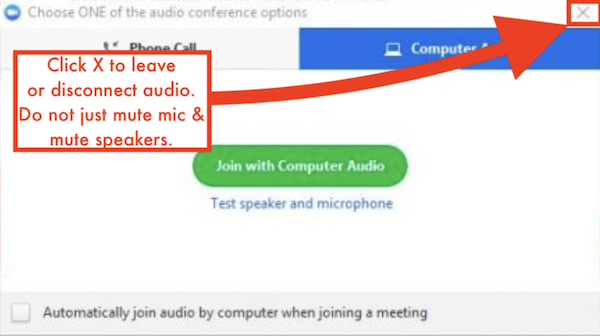
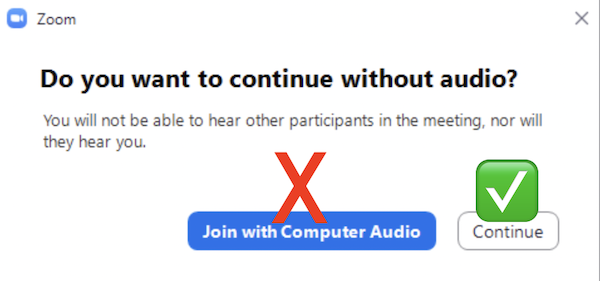
- Another pop-up will ask if 'you want to continue without audio?' Select the 'Continue' button.
- Next to the 'mute'/microphone icon on the bottom bar, click the '^' button.
- Click the 'Leave Computer Audio' button on the list of settings after completing the previous step.
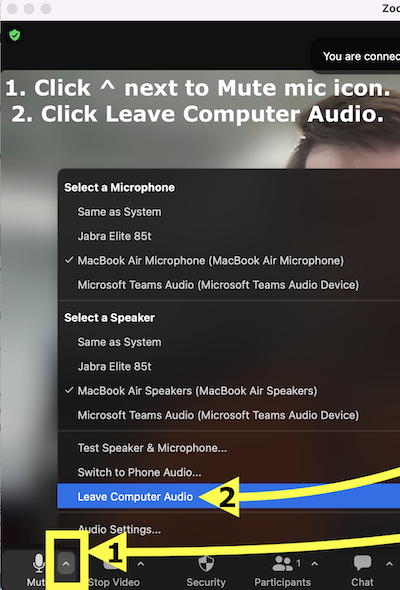
- The bottom bar will have a 'Join Audio'/headphone icon appear.
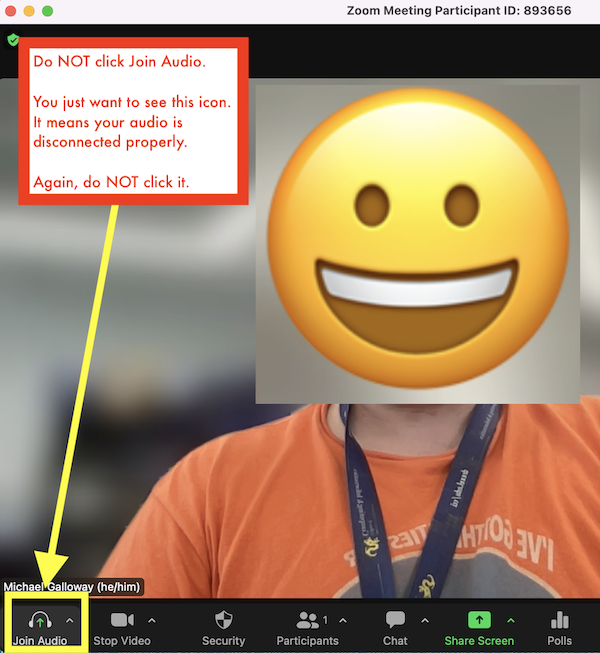
- Now you have successfully disconnected from your computer's audio on Zoom.