
Gitlab Basics
What is Gitlab?
Gitlab is a service managed by CCI for collaboration and versioning of small project files, especially for source code. It is available to all CCI students, faculty and staff.
Logging in
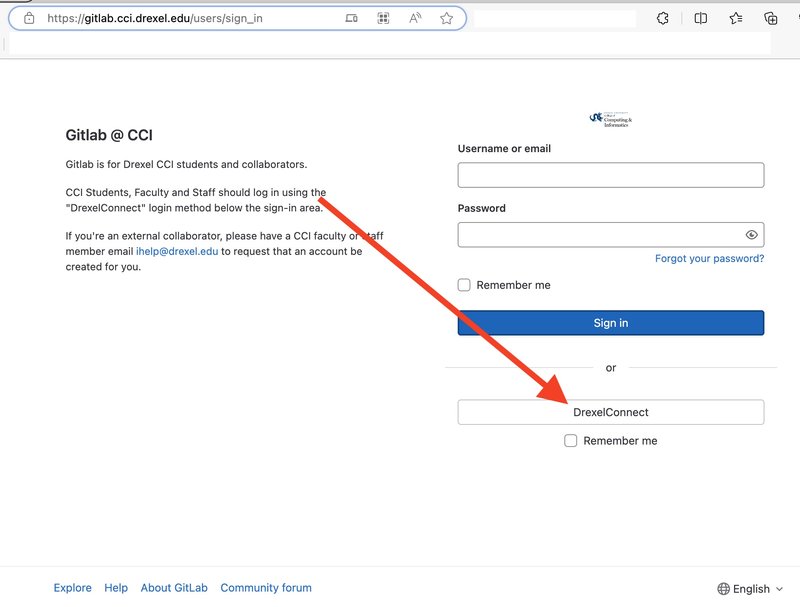
To log into Gitlab, visit https://gitlab.cci.drexel.edu in your web browser of choice, and select the Sign in with DrexelConnect login method.
Once logged in, you should be
directed to your Projects page. This will be empty to begin with, but as
you create projects they will become available here.
Installing Git client
Windows: Visit Installing Git client on Windows
Linux: Use your distro's package manager to install git, eg. yum install git or apt-get install git.
macOS: open the Terminal from Applications > Utilities and run the command git --version. macOS will prompt you to install the command line development tools if they're not installed yet.
Configuring SSH key authentication
SSH key-based authentication is the most secure and recommended way of connecting to Gitlab from all Git clients.
First, you'll need to create an SSH key for your computer. First, launch your terminal as follows:
Windows: open the Start menu and open "Git Bash" from the "Git" program group (Git must be installed following the earlier instructions first)
macOS: open Terminal.app from Applications > Utilities
Linux: Log into a server over SSH, or find the terminal app for your distribution from the app launcher from your distribution.
Once you have a command line open, run the command ssh-keygen
and follow the prompts. You should accept the default location for the
key by pressing the Enter or Return key. For increased security, you can
also provide a password, which will be required each time you log into
Git; leave the prompt empty and press the Enter or Return key to avoid
setting a password.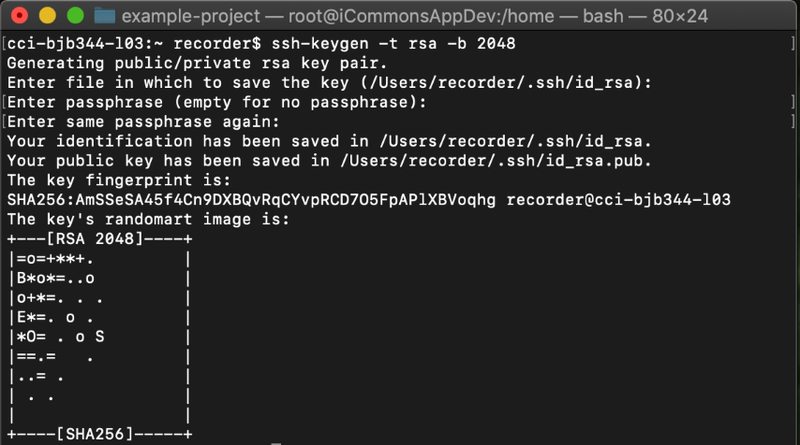
Next, we need to copy the public
key for your SSH key pair to add it to our project in Gitlab. This can
be retrieved by running the command cat .ssh/id_rsa.pub from your home folder:
Windows (Git Bash): select text, right click, and choose "Copy"
Windows (PuTTY): Select text and it will automatically be copied to the clipboard
Windows (CMD/PowerShell): Select text and press the Enter key to copy to the clipboard
Mac: select text and use command-c to copy the text
Linux: This depends on how you're connected to Linux. Linux GUI terminals will differ, but generally you can select text and use the Edit menu to copy the text. If you're connected by SSH, use the method above for the client you're connecting from.
Add the key to Gitlab:
Next, log into the Gitlab web
interface. When you log in, you should see a menu in the top right of
the screen. Click this menu and choose "Settings" to get to your
Settings page.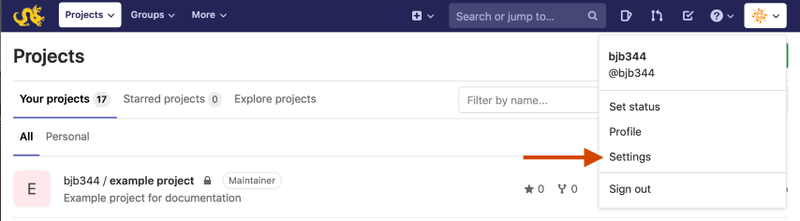
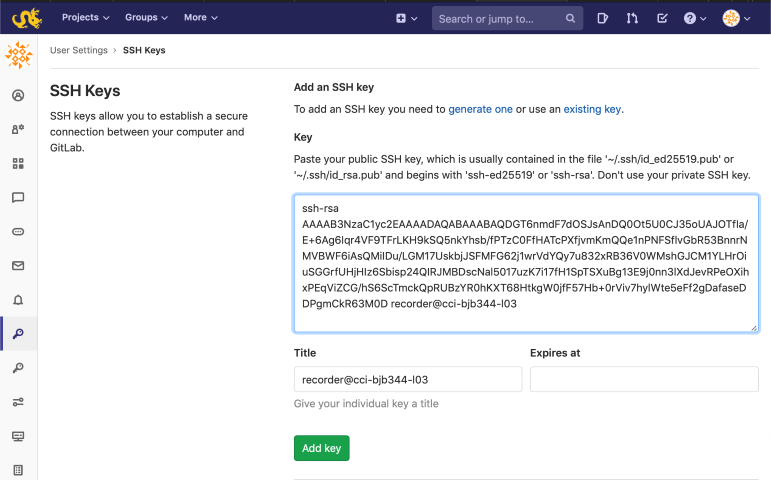
From the Settings page, click the first key icon which has a label of "SSH Keys"
In the window that opens, you can paste your SSH key and give it a description. Click "Add key" and you should be ready to use SSH key-based authentication with your Gitlab account.
Creating a Project
Once you've configured your computer to access
Gitlab, you'll need to set up a project to store your files. First, log
into the Gitlab web interface, and you should start at your Projects
page. Click "New project" to open the New Project page.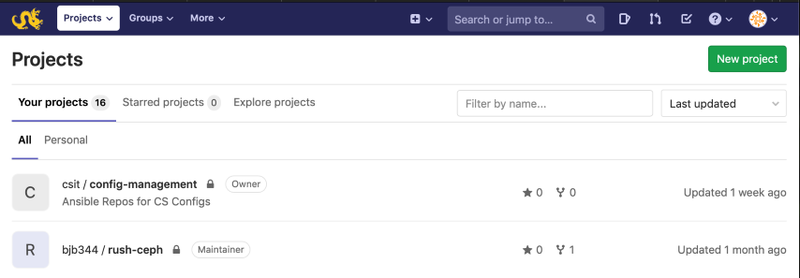
On the new project page, you must set
a name for your project. The project URL will be automatically
generated, as will the "project slug". You can also set a description,
and should choose the appropriate security level for your project.
Private projects will only allow access to yourself and users you
specifically choose. Internal projects can be seen by anyone who logs
into Gitlab. Public projects can be seen by everyone. You can also
choose to include a README file, which will keep you from getting a
warning when you clone an empty project.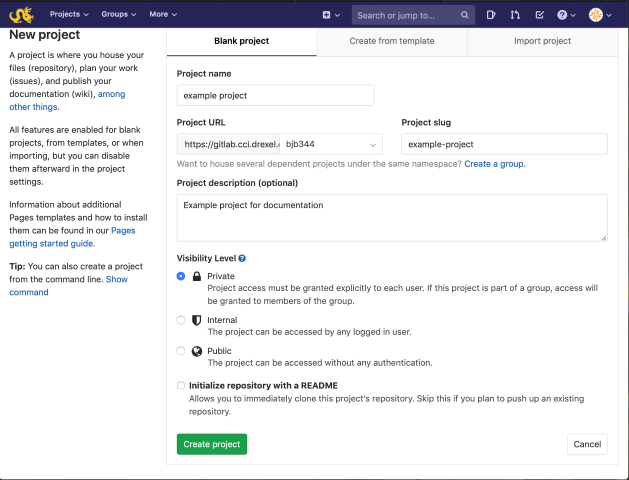
Cloning a Project
Cloning a project creates a copy of the files
associated with it on your local computer. To clone the repository,
visit your project in your Web browser and click the "Clone" drop-down
button. From the options that come up, copy the string under "Clone with
SSH" into your clipboard, and follow the Mac, Linux, or Windows
instructions below.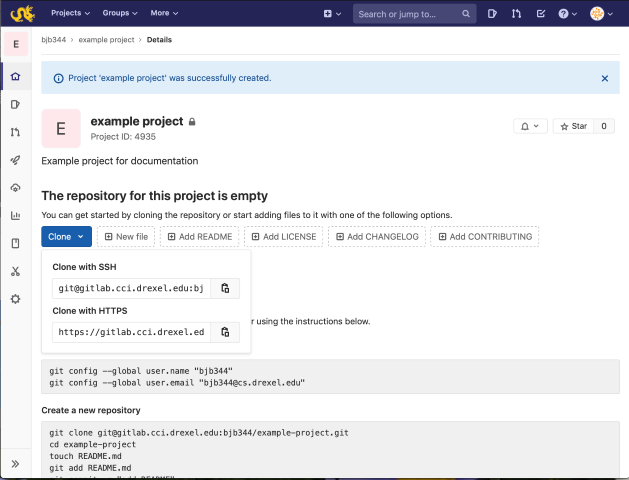
Open the terminal application you used to generate an SSH key earlier, and use the cd command to move to the folder where you want your project to be stored. Run the command git clone
followed by the string of text you copied from the Gitlab window
earlier, and press Return or Enter. Your computer may ask if it's okay
to connect to Gitlab if you haven't connected before - accept the SSH
host key and your project repository should be copied to your local
machine.
Adding Files to a Project
Within the Terminal application you used earlier, use cd
to move to your project folder. Create a new file in this folder using
any application, in my example below I used the Vim text editor. Once
the file is saved, you can run ls to ensure that the file is there. To tell Git to track your file, run the command git add followed by the name of your file. You can then run the command git commit -a to commit your changes, and git push to upload the changes to the Gitlab server. Future changes can be uploaded to Gitlab by running the commands git commit -a and git push again.
Getting updated files from Gitlab
Within the Terminal application you used earlier, use cd to move to your project folder. Run the command git pull to retrieve the latest changes from the Gitlab server. If you've made any changes locally, you should first run the commands git commit -a and git push to ensure that Gitlab is up to date and in sync with all changes.