
VPN -- Linux -- Install Cisco AnyConnect VPN to Connect to Drexel Network
Drexel's VPN Now Requires Multi-Factor Authentication (MFA)
Once you login to the VPN, and click "Connect," answer your phone, and press the # sign. Or press "Approve" in the Microsoft Authenticator App notification (unlocking your phone may be required).
To set-up MFA, or change to the Microsoft Authenticator App (especially if you travel outside the U.S. and wish to avoid excessive call or data roaming charges), see the following webpage.
Most Frequent Issue - If Using Authenticator App
- Make sure your check your phone if you use the Authenticator app for a notification.
- Actually open up the Authenticator app on your phone to check as well.
- Click the Drexel account if you have more then 1 account there.
- And click the circling arrow refresh icon.
- Sometimes, notifications to approve MFA do not appear until you do this.
Instructions
Here is how to install/configure Drexel's Cisco AnyConnect VPN with the 2 most recent versions of Long Term Support (LTS) Ubuntu Linux: 16.04 & 18.04 & 20.04 LTS
- Open a terminal window or command-line prompt window in Ubuntu Linux 16.04 LTS.
Press the Ctrl-Alt-t keyboard keys simultaneously.
Or... right-click the desktop background, and select "Open Terminal."
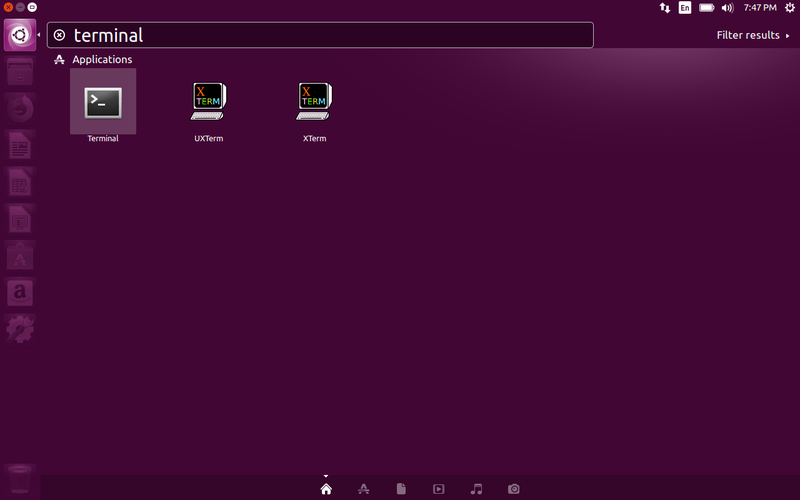
Or... click "Ubuntu" or "Activities" icon in upper left. "Dash" search will open.
Type in "terminal" (without quotes).
- Type in the following in a terminal window. Press the Enter/Return key after each command.
sudo apt install network-manager-openconnect
y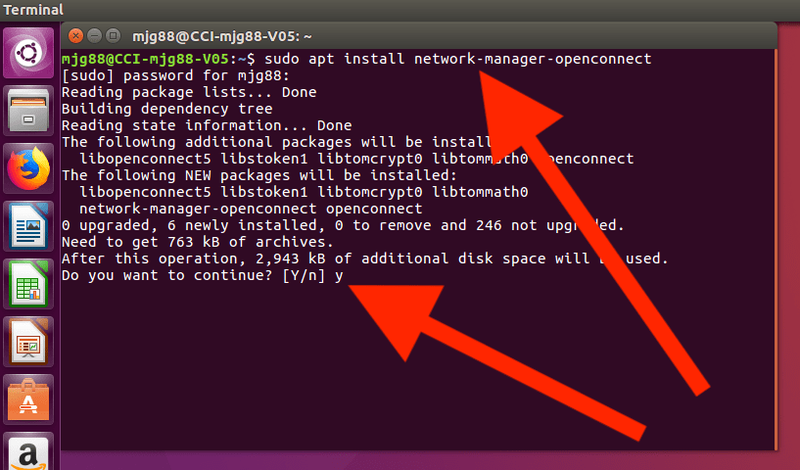
- Type in the following in the terminal window. And then press the Enter/Return key.
sudo systemctl daemon-reload
- Visit https://vpn.drexel.edu in a web browser (Firefox recommended).
Login with your DrexelOne userid & password.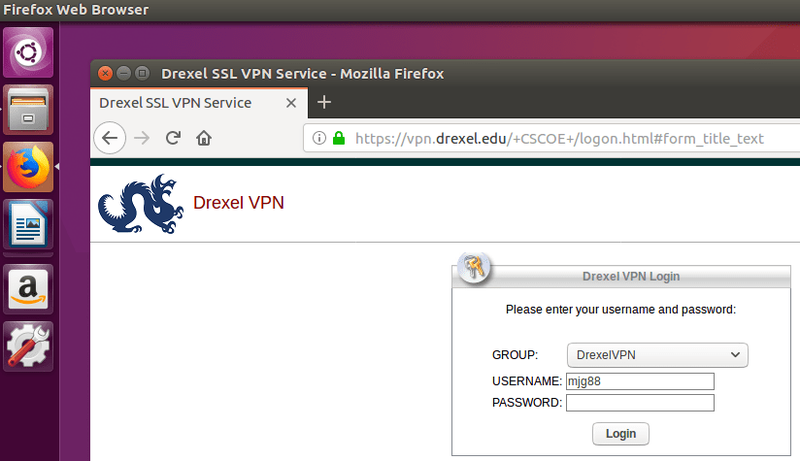
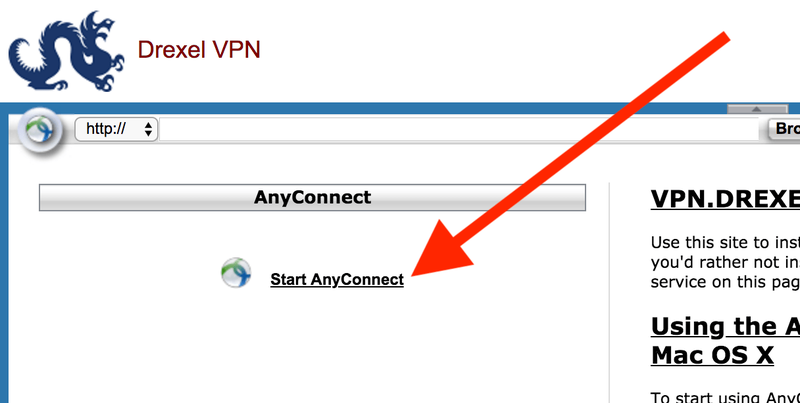
- Click "Start AnyConnect".
- Click "Download for Linux" under "Download & Install."
IGNORE the "+Instructions" button.
No accurate help there for Linux.
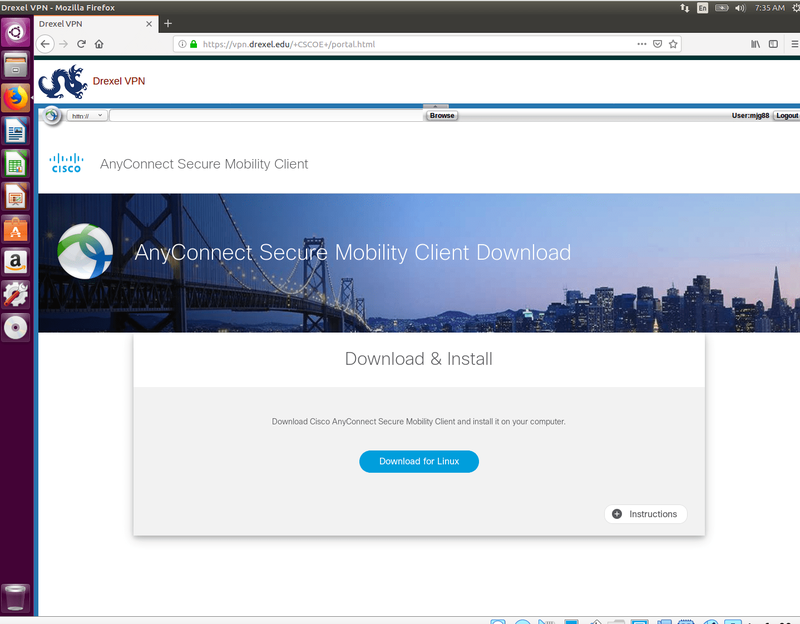
- Download the AnyConnect "anyconnect-linux64-#.#.#####-core-vpn-webdeploy-k9.sh" (bash) file.
# can be any single number here.
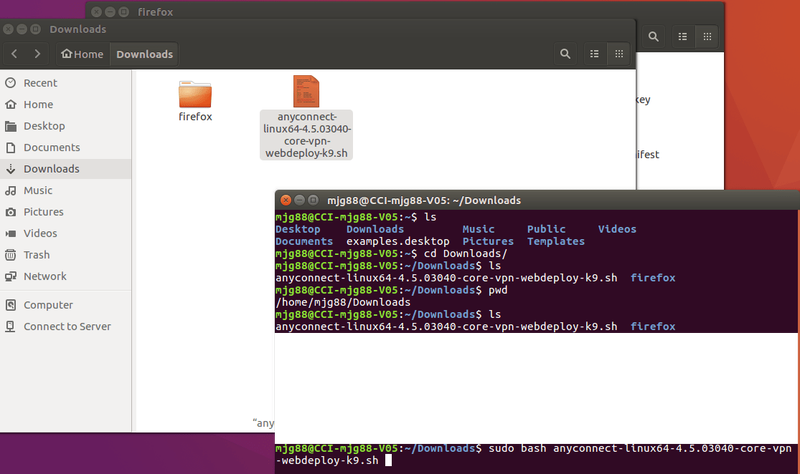
This usually goes to the "Downloads" folder by default.
We'll assume that's the case here. - Type in the following in the terminal window. Then press the Enter/Return key.
cd Downloads - Type in the following in the terminal window. Then press the Enter/Return key.
sudo bash anyconnect-linux64-#.#.#####-core-vpn-webdeploy-k9.sh
Hint: Type in "sudo bash anyc" (without quotes) and press the Tab key on the keyboard.
The rest of the "anyconnect" file name should auto-complete.
Note: You might have a different version number for the "anyconnect" file name.
If so, type in the correct version number in the command below.
# can be any single number here.
- For Ubuntu Linux 18.04 LTS only, type in the following in the terminal window. Then press the Enter/Return key.
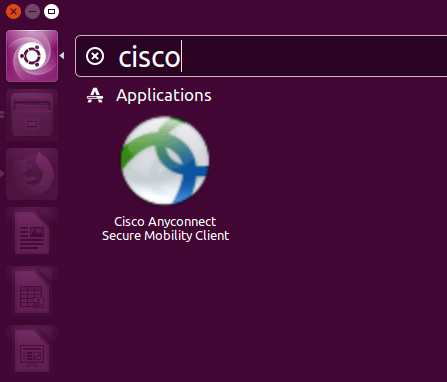
sudo apt install libpangox-1.0-0 - Click the "Dash" or "Activities" search icon in the upper left. Search for "Cisco" (without quotes). Click to open it.
- In the "Cisco AnyConnect" VPN client window, type in "vpn.drexel.edu" (without quotes) in the "Connect to" field.
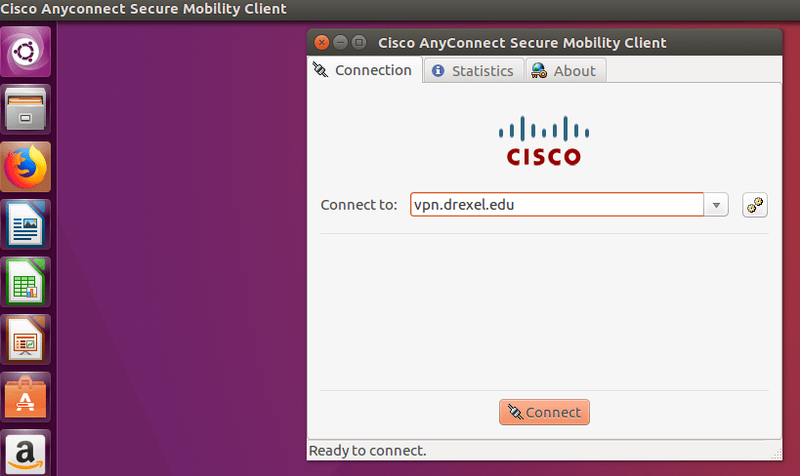
- In the "Cisco AnyConnect" VPN client window,
type in "DrexelVPN" in the "Group" field.
And login with your DrexelOne or Drexel Connect userid & password.
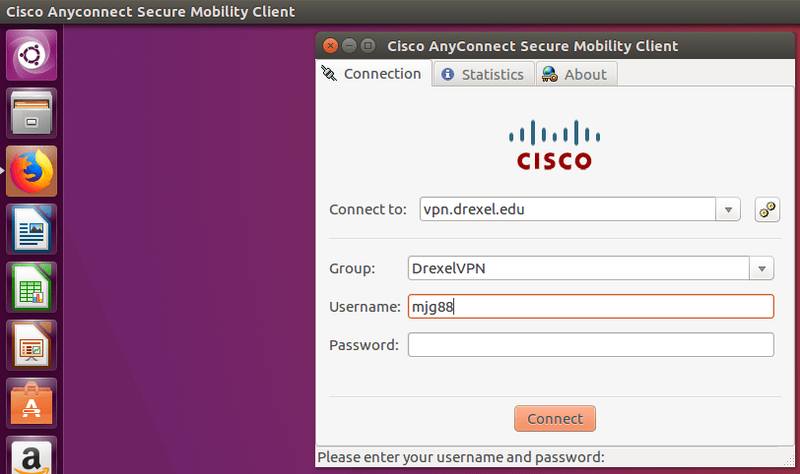
- Click "Connect."
- IMPORTANT NOTE: The VPN app may say "Login failed" until your approve MFA if you use an Authenticator app.
- Use your Drexel Multi-Factor Authentication of MFA method to "Approve" the connection (or press # when called on the phone).
Drexel's VPN new requires Mutli-Factor Authentication or MFA.
Once you login to the VPN, and click "Connect," answer your phone, and press the # sign.
Or press "Approve" in the Microsoft Authenticator App notification (unlocking your phone may be required).
To set-up MFA, or change to the Microsoft Authenticator App
(especially if you travel outside the U.S. and wish to avoid excessive call or data roaming charges),
see Microsoft Multi-Factor Authentication (MFA)
If using Microsoft Authenticator app, VPN will hang or say fail until you approve MFA.
Or 1 minute or so has passed. - You should see a notification that "Cisco AnyConnect Secure Mobility Client" is "Connected."
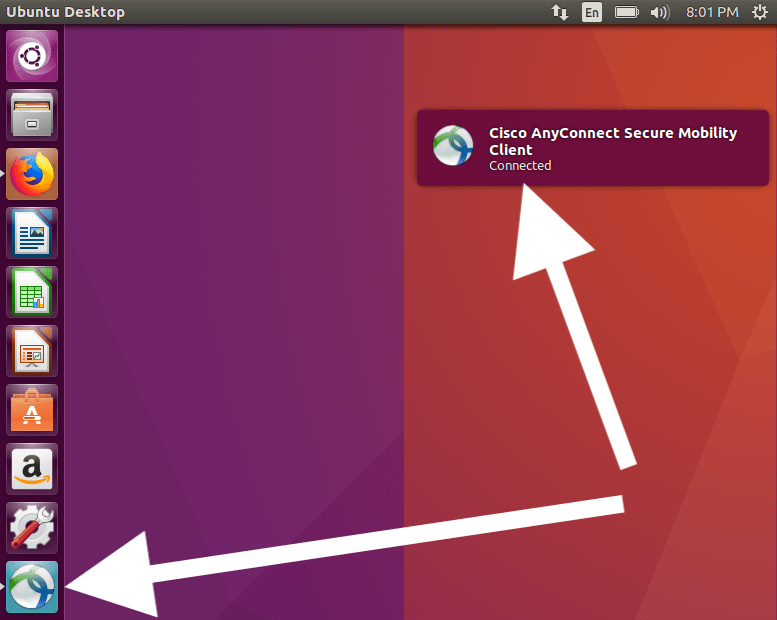
If you are asked to reboot, do so.
If you run into an issue, try another reboot.