
VoiceThread Assignments
Submit a Comment Assignment
For this type of assignment, students have to submit a comment on a VoiceThread the instructor created.
IMPORTANT!
Edit the "Playback" settings so students cannot edit or delete submitted comments.
See instructions below for how.
Unable to render {include} The included page could not be found.
There are 2 parts to creating this type of assignment.
Create a VoiceThread Link
- Navigate to a "Content Area" in your Bb Learn course shell.
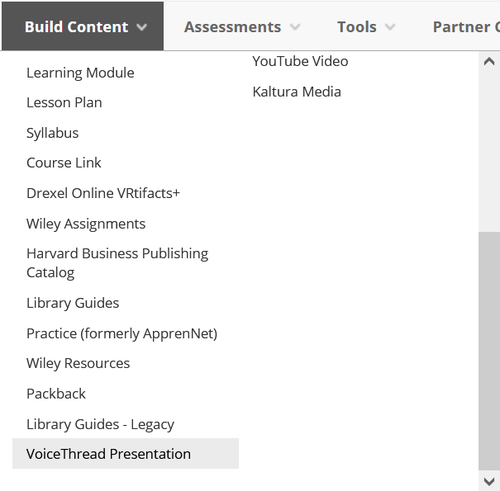
- Click“Build Content.”
(a) To see what a "Content Area" is, see Bb Learn Content Area -- Creation. - Click “VoiceThread Presentation.”
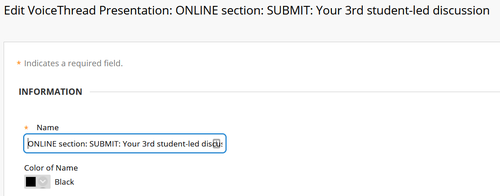
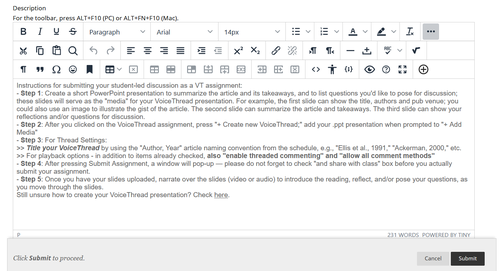
- Enter a "Name" and optional "Description."
- Add attachments in the "ATTACHMENTS" area.
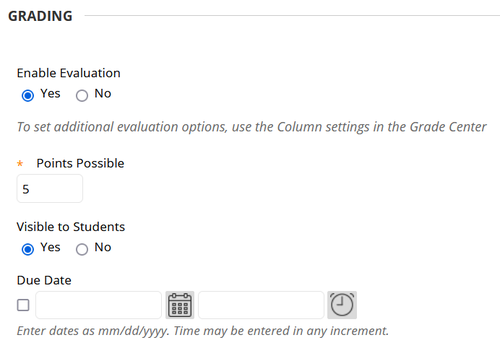
(a) (Optional) Choose "Color of Name." - (Optional) To grade the VoiceThread:Choose whether you will "Permit Users to View this Content." (Users = students.)
(a) Select "Yes" next to "Enable Evaluation."
(b) Enter the "Points Possible."
(c) Choose if the grade will be "Visible to Students."
(d) (Optional) Set a "Due Date." - Choose whether you will "Track Number of Views."
- (Optional) "Select Date and Time Restrictions."
(a) Be sure to select "Yes" for "Permit Users to View This Content" if you have date/time restrictions. - Click "Submit."
(a) Your VoiceThread link is created, but it has to be configured. - Click the new VoiceThread link to set it up.
- Then choose a type of VoiceThread to set-up.
Set the VoiceThread assignment to be a "Submit a Comment" assignment
- Set up a graded VoiceThread link (see above).
- Click the VoiceThread link and choose "Assignment Builder."
- Click "Submit a Comment":
- Select an existing VoiceThread or create a new VoiceThread for students to comment on.
(a) For creating a VoiceThread, the video on the page below will provide further instructions.
i. https://voicethread.com/howto/category/creating-web-application/ - If you wish, Preview, Edit, or make a copy of the selected VoiceThread.
(a) Recommended: Make a copy of any VoiceThread you used in another assignment in this or any other Bb Learn course shell.
i. Otherwise, students might see comments from students from previous or other courses.
ii. Also, sharing the exact same VoiceThread for two or more assignments in the same course may lead to technical issues. - Enter an assignment description if you wish.
(a) Recommended: Note in the assignment description that this is a "Submit a Comment" assignment.
i. Otherwise, students cannot distinguish this VoiceThread assignment from other VoiceThreads in the same Bb Learn course shell. - Enter the minimum number of required comments.
- Check the "and share with class" box to share the selected VoiceThread with your class.
- Do NOT check the box to "moderate comments."
(a) Otherwise, you'll have to review all comments and make them visible to other students.
(b) If you check this box, note this in the assignment description. Or students won't know. - Want to allow resubmissions? Check the "Allow students to resubmit assignment" box.
(a) Note this in the assignment description. Or students won't know. - Review the settings.
(a) You can't change these settings after the next step. - Click "Create Assignment."
- Now click the blue hyperlink next to "VoiceThread Title" in the center of the page.
Your VoiceThread will not be titled "Two Test PPTs."
Also, the title of the VoiceThread assignment will not be "VThread SubmitComment mod & resubmit."
- Click the stack-of-3-lines icon in the upper left.
- Click "Edit."
- Click the tiny "edit" link next to the title of the VoiceThread.
Your VoiceThread will not be titled "Two Test PPTs."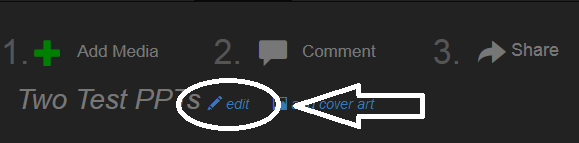
- Click the "Playback Options" tab.
- Check the box that says "Don't allow commenters to delete their own comments."
- Click "Save."
- Close the current internet browser tab/window you are in, and in the other internet browser tab/window, click the house icon in the upper left to return to the home page of the course.
Grade Center does not show when students have submitted VoiceThread assignments.
- If you click an "Assignment Builder" VoiceThread assignment, you will see a list of who and who has not submitted.
- And you can send a reminder email to one or all of the students who have not submitted.
Watch a VoiceThread Assignment
For this type of assignment, students will have to watch a VoiceThread.
There are 2 parts to creating this type of assignment.
Create a VoiceThread Link
- Navigate to a "Content Area" in your Bb Learn course shell.
- Click“Build Content.”
(a) To see what a "Content Area" is, see Bb Learn Content Area -- Creation. - Click “VoiceThread Presentation.”
- Enter a "Name" and optional "Description."
- Add attachments in the "ATTACHMENTS" area.
(a) (Optional) Choose "Color of Name." - (Optional) To grade the VoiceThread:Choose whether you will "Permit Users to View this Content." (Users = students.)
(a) Select "Yes" next to "Enable Evaluation."
(b) Enter the "Points Possible."
(c) Choose if the grade will be "Visible to Students."
(d) (Optional) Set a "Due Date." - Choose whether you will "Track Number of Views."
- (Optional) "Select Date and Time Restrictions."
(a) Be sure to select "Yes" for "Permit Users to View This Content" if you have date/time restrictions. - Click "Submit."
(a) Your VoiceThread link is created, but it has to be configured. - Click the new VoiceThread link to set it up.
- Then choose a type of VoiceThread to set-up.
Set the VoiceThread assignment to be a "Watch a VoiceThread" assignment
- Set up a graded VoiceThread link (see above).
- Click the VoiceThread link and choose "Assignment Builder."
- Click "Watch a VoiceThread".
- Select an existing VoiceThread or create a new VoiceThread for students to watch.
(a) For creating a VoiceThread, the video on the page below will provide further instructions.
i. https://voicethread.com/howto/category/creating-web-application/ - If you wish, Preview, Edit, or make a copy of the selected VoiceThread.
(a) It's highly recommended to make a copy of any VoiceThread you used in another assignment in this or any other Bb Learn course shell. Otherwise, students might see comments from students in other courses or for other assignments. Also sharing the exact same VoiceThread for two or more assignments in the same course may lead to technical issues. - Enter an assignment description if you wish.
(a) We recommend noting that this is a "Watch a VoiceThread" assignment in the assignment description so student's can easily distinguish this VoiceThreads from other possible VoiceThreads in the course. - Check the "and share with class" box to share the selected VoiceThread with your class.
- Check the "Allow students to resubmit assignment" box if you want to allow students to be able to resubmit the assignment.
(a) We recommend making a text note about the option you choose here in the assignment description. Otherwise, it's hard to tell after the assignment is created. - Click "Create Assignment." Note you can't undo changes once you click this.
Grade Center does not show when students have submitted VoiceThread assignments.
- If you click an "Assignment Builder" VoiceThread assignment, you will see a list of who and who has not submitted.
- And you can send a reminder email to one or all of the students who have not submitted.
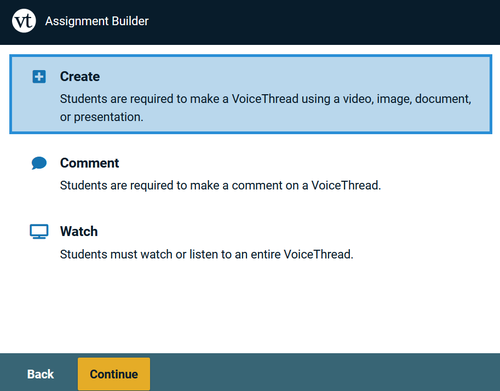
Create a VoiceThread Assignment
For this type of assignment, students have to create and submit a VoiceThread of their own.
There are 2 parts to creating this type of assignment.
Create a VoiceThread Link
- Navigate to a "Content Area" in your Bb Learn course shell.
- Click“Build Content.”
(a) To see what a "Content Area" is, see Bb Learn Content Area -- Creation. - Click “VoiceThread Presentation.”
- Enter a "Name" and optional "Description."
- Add attachments in the "ATTACHMENTS" area.
(a) (Optional) Choose "Color of Name." - (Optional) To grade the VoiceThread:Choose whether you will "Permit Users to View this Content." (Users = students.)
(a) Select "Yes" next to "Enable Evaluation."
(b) Enter the "Points Possible."
(c) Choose if the grade will be "Visible to Students."
(d) (Optional) Set a "Due Date."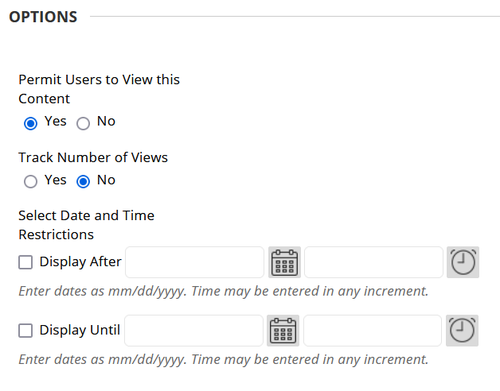
- Choose whether you will "Track Number of Views."
- (Optional) "Select Date and Time Restrictions."
(a) Be sure to select "Yes" for "Permit Users to View This Content" if you have date/time restrictions. - Click "Submit."
(a) Your VoiceThread link is created, but it has to be configured.
- Click the new VoiceThread link to set it up.
- Then choose a type of VoiceThread to set-up.
Set the VoiceThread assignment to be a "Create a VoiceThread" assignment
- Set up a graded VoiceThread link (see above).
- Click the VoiceThread link and choose "Assignment Builder."
- Click "Create a VoiceThread"
- Enter an assignment description if you wish
(a) Recommended: Note in the assignment description that this VoiceThread is a "Create a VoiceThread" assignment.
(b) That way, student's can easily distinguish this VoiceThread from others in your Bb Learn course shell.
- Check the "Allow students to resubmit assignment" box if you want to allow students to be able to resubmit the assignment.
(a) Recommended: Note in the assignment description which the option you choose here in the assignment description.
(b) Otherwise, students will not know if they can resubmit or not.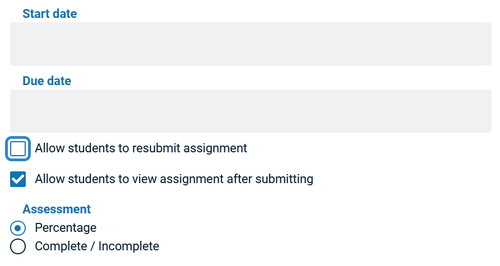
- Review your settings.
(a) You cannot change settings after the next step! - Click "Create Assignment."
Grading
Grade Center does not show when students have submitted VoiceThread assignments.
- If you click an "Assignment Builder" VoiceThread assignment, you will see a list of who and who has not submitted.
- And you can send a reminder email to one or all of the students who have not submitted.
For a "Watch a VoiceThread" assignment:
- No grading is necessary.
- Once the student watches the VoiceThread all the way through and clicks "Submit Assignment," the student instantly receives 100% credit.
Video Instructions
Written Step-by-Step Instructions
- Do either (a) or (b) and their sub-steps below,
(a) In "Full Grade Center:"
i. Hover over the cell for a student for the VoiceThread assignment.
ii. Click the circled down arrow in the cell.
iii. Click "Grade User Entry.
iv. Proceed to step #2.
(b) Navigate to where the VoiceThread submission link can be found in your Bb Learn course shell.
i. Click the VoiceThread link.
1. VoiceThread submission links are always in a "Content Area."
2. If you are not sure what a "Content Area" is, see the following webpage.
(a) Bb Learn Content Area -- Creation
ii. Proceed to step #2. - Look for the student's name.
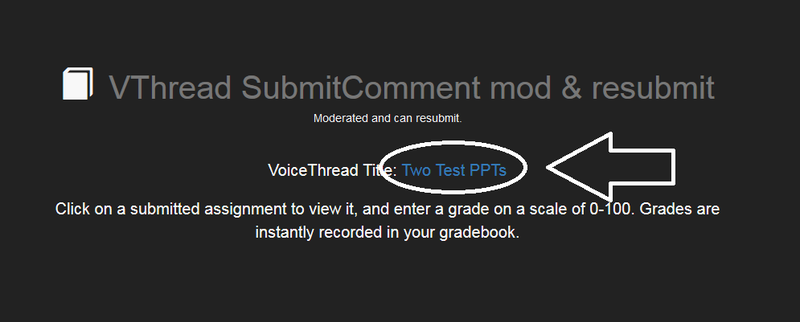
(a) Look under "Submitted" on the right-hand side of the VoiceThread grading webpage. - Click the student's name, look over slides and/or 1 or more comments listed for the student, and enter a number between 0-100 as a grade.
(a) This is the percentage score the student received.
(b) The percentage score will be applied to the total points possible set for the assignment in "Full Grade Center."
(c) Example:
i. A 10 is entered on the VoiceThread grading webpage, which stands for 10%.
ii. In "Full Grade Center," the VoiceThread assignment is set to have 20 points possible.
iii. So a 2 will appear in "Full Grade Center" for this student's VoiceThread assignment grade. - Click the % button.
- Repeat for each student you want to grade.
- Click the house icon in the upper left.
(a) This returns you to your Bb Learn course shell's homepage. - Grades you enter in VoiceThread will be entered automatically into "Full Grade Center" in the Bb Learn course shell.
(a) Also, if you modify a student's grade in "Full Grade Center," that grade will be modified in VoiceThread.
How Students Submit, and Student Help
- Share the following webpage with your students
o VoiceThread Assignments -- Student Help