
File Exchange and Send Email Group Tools Instructions for Students
Introduction
Here is how students can access their "Groups" area and use the email and file exchange tools found there. The email function lets you send email to one or more of your fellow group members from Bb Learn. The file exchange function lets you post files for one or more of your fellow group members to download from Bb Learn.
Accessing the Groups, File Exchange, and Send Email Areas
- Look at the bottom of the left-hand course menu for a section entitled "My Groups."
- Under "My Groups" should appear your group's name, and under your group's name should appear the options "File Exchange" and "Send Email." If you don't see these options, click on your group's name.
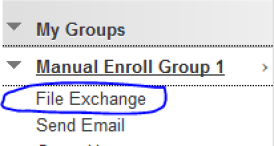
- To enter the "File Exchange" area, click the "File Exchange" link under your group's name under "My Groups." The example screenshot below has a different group name than what your group's name will be.
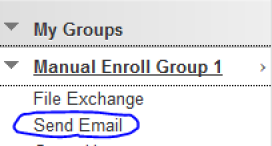
- To enter the "Send Email" area, click the "Send Email" link under your group's name under "My Groups." The example screenshot below has a different group name than what your group's name will be.
Add a File to File Exchange
If you want to add a file to the "File Exchange" area, enter the "File Exchange area" as instructed above, then do the following:
- Click "Add File."
- Enter in a "Name" for the "File."
- Click "Browse My Computer," then locate and select a file from your computer for uploading to Bb Learn.
- Click "Submit."
Open a File from File Exchange
If you want to open a file from the "File Exchange" area, enter the "File Exchange area" as instructed above, then click on the "File Name" of the file. An example is shown in the screenshot below.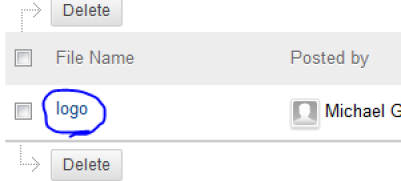
Delete a File from File Exchange
If you want to delete a file from the "File Exchange" area, enter the "File Exchange area" as instructed above, check the box next to the file, click "Delete," then click "OK."
Send an Email
If you want to send an email, enter the "Send Email" area on your group page as instructed above, then do the following:
- Select a group member from the "Available to Select" box or click "Select All" to select all the group members.
- Click the right arrow or ">" sign between the "Available to Select" and "Selected" boxes (the right arrow is circled in the example screenshot below).

- Repeat steps 1 and 2 if there are any group members to whom you wish to send a message that are not appearing in the "Selected" box.
- Enter a "Subject."
- Enter your "Message." Additional formatting options can be found by clicking the double down arrow circled in the example screenshot below.

- If you want to attach one or more files to send with the email, click "Attach a file," then click "Browse," then find and select a file from your computer to attach.
a. If you want to attach another file, click "Attach Another File," then click "Browse," then find and select another file from your computer to attach. - Click "Submit."
Emails can only be sent from Bb Learn. You cannot read emails within Bb Learn, and Bb Learn does not retain copies of sent emails.