
Introduction
Great for voice-over PowerPoint presentations, Kaltura Capture lets you record anything you do on your computer screen as a video with audio. Kaltura Capture is an option within the Kaltura tool in Bb Learn, or within Drexel Streams. Once you stop the recording, you can easily upload to Bb Learn via the Kaltura tool. Or to Drexel Streams, from which you can either upload to Bb Learn or share in other ways.
ExpressCapture is NOT the same thing as Kaltura Capture. You cannot screen record with ExpressCapture.
Advantage of Kaltura Capture? The videos you make and upload to Kaltura or Drexel Streams and use in Bb Learn can allow viewers or students to make either the webcam video or the recorded screen video the larger or the more primary focus in the video at any time.
Quick Instructions -- Bb Learn
- Enter a Bb Learn course section at https://learn.drexel.edu . Click "Courses." Click your course.
- Enter a "Week" or other content area in the Bb Learn course section.
- Click "Build Content" > "Kaltura Media" > "+Add Media" > "Kaltura Capture."
- Follow the on-screen instructions.
Alternative Quick Instructions -- Drexel Streams
- Visit Drexel Streams at https://drexel.edu/it/streams .
- Click "+Add Media" > "Kaltura Capture."
- Follow the on-screen instructions.
- Enter a Bb Learn course section at https://learn.drexel.edu . Click "Courses." Click your course.
- Enter a "Week" or other content area in the Bb Learn course section.
- Click "Build Content" > "Kaltura Media" > "+Add Media"
Quick Troubleshooting
Kaltura Capture has been a memory HOG in the past. The issue has been reported and may be resolved on some OS's or browsers.
However, you may want to close non-essential applications before using Kaltura Capture.
And disable any ad blockers or privacy enhancing web browser plug-ins or add-ons for the Bb Learn and Drexel Streams websites, if you use any.
Also, open the applications you need for your recording before you start recording. Outlook, for example, in the past would't open while Kaltura Capture was in use. It had to be opened previously.
And if you run into persistent issues, try the other alternatives below for making screen recordings.
In-Depth Instructions
- Login to Kaltura Drexel Streams at https://drexel.edu/it/streams
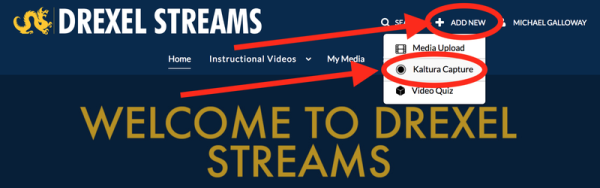
On the Drexel Streams webpage, click "ADD NEW," then "Kaltura Capture."
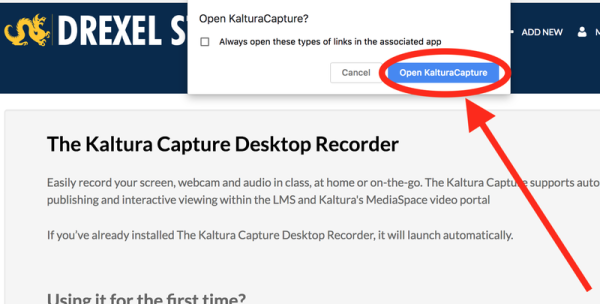
If prompted if it's okay to use KalturaCaptura to open this link, click "Open KalturaCaptura," or "OK" or "Yes."
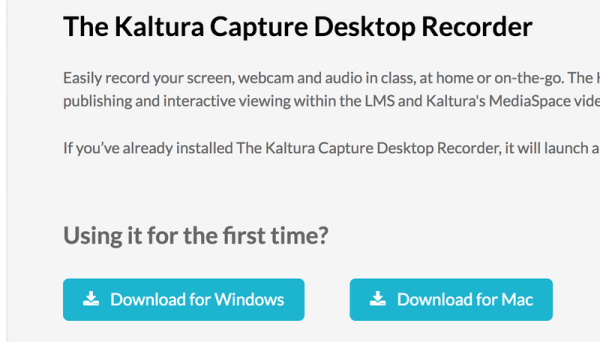
If you haven't used KalturaCapture yet on this computer, click the link below for help installing it.
Click either "Download for Windows" or "Download for Mac," depending on whether you are on Windows or a Mac.
Install KalturaCapture as you normally install a Mac or Windows program.
- If necessary, repeat steps 4 and 5 above
When the KalturaCapture control panel opens:
Set whether to record from your computer display, webcam, and/or microphone.
To set to record your computer display.
Make sure the computer display icon is blue (and NOT crossed out).
There are multiple images below.
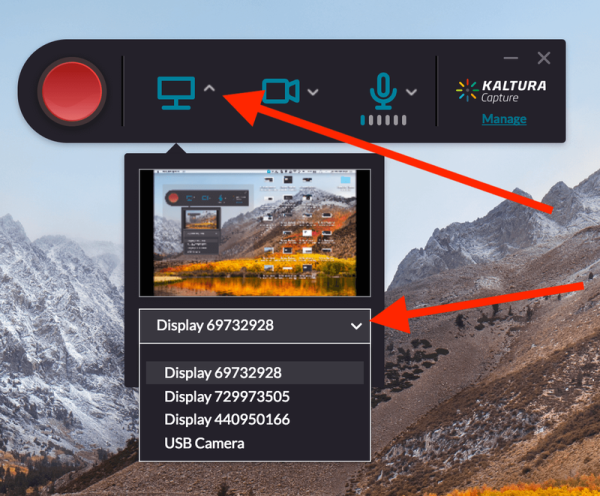
Here, the computer display icon is blue, meaning your computer display will be recorded.

Here, the computer display icon is gray and crossed out, meaning your computer display will NOT be recorded.

Click ^ to select a different display to record from, if you have multiple monitors or a connected projector.
You can select a part of your screen to capture too. Click "Select Area."You can select your screen capture size if you wish.
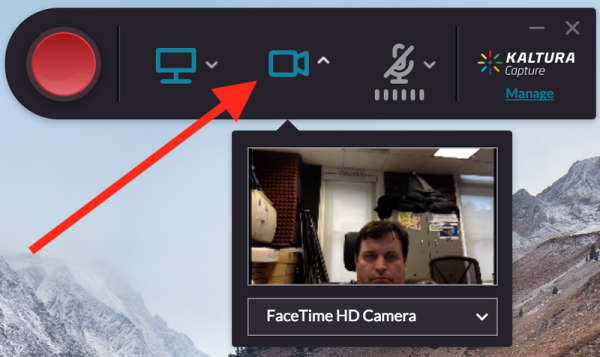
To set to record from your webcam.
Make sure the camera icon is blue (and NOT crossed out).
If you want, select another connected or built-in camera to record from, if available.
There are multiple images below.
Here, the camera icon is blue, meaning your webcam will record video.
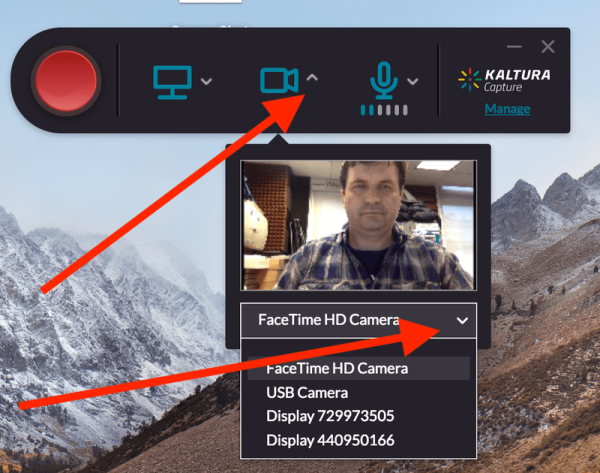
Also, if you have 2 webcams connected, you can choose to record from the other webcam or camera.
Here, the camera icon is gray and crossed out, meaning your webcam will NOT record video.

Click ^ to select a different webcam, if another one is built-in or connected to your computer, to record from.
Monitors or projectors may appear as choices here too.
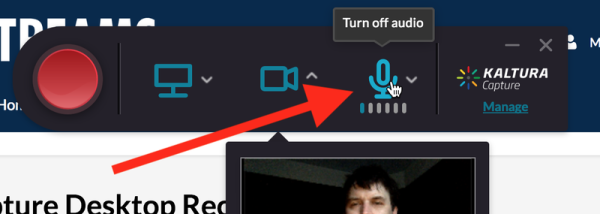
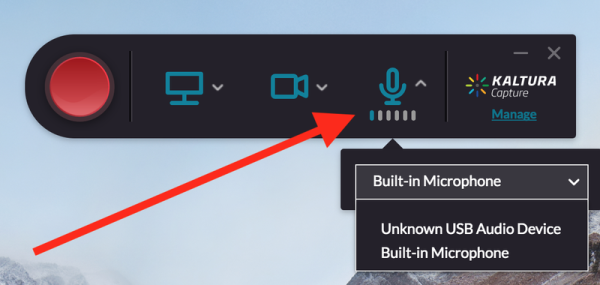
- To set to record audio.
Make sure the microphone icon is blue (and NOT crossed out).
Also, check the audio level indicator under the microphone moves when you talk.
There are multiple images below.
Here, the microphone icon is blue, meaning audio will be recorded.
Check that the audio level indicator moves up and down (series of small ovals under the microphone icon) to make sure audio is being picked up.
Here, the microphone icon is gray and crossed out, meaning your computer display will NOT be recorded.
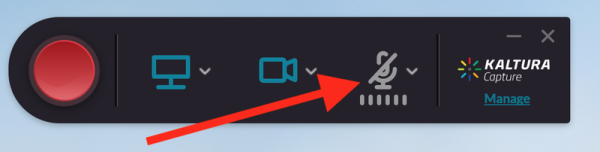
Click ^ to select a different microphone, if you have a different one connected or built-in, to record from.
Microphones can often appear as "Unknown USB Audio Device."
To record, click the red circle in the control panel.
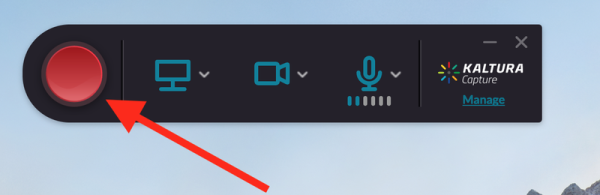
- 3-second countdown starts immediately. Then you will be recording.
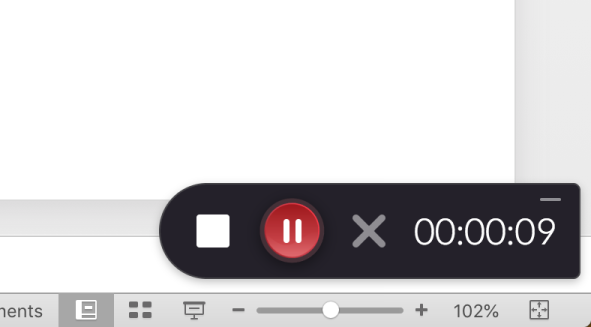
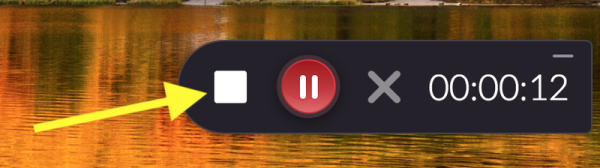
A mini control panel appears for pausing/stopping the recording.
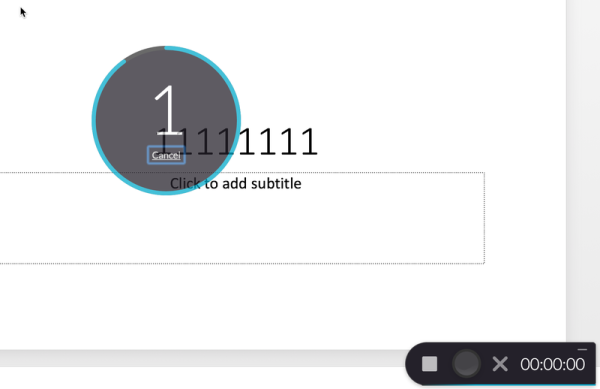
This mini control panel does not appear in the screen recording.
- Make your screen recording or voice-over PowerPoint or similar video.
- Ignore errors that save low on disk space, but note that some applications may not run
Press the white square or stop icon to stop the recording.
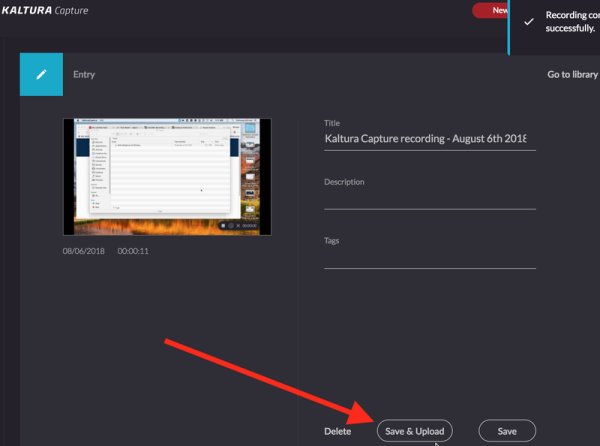
- You can then choose to "Delete, Save and Upload, or Save the recording.
- Just "Save" will save the recording to your computer locally. The recording cannot easily be placed elsewhere.
- "Delete" will delete/discard the recording.
- (RECOMMENDED) "Save and Upload" will save and upload the recording Drexel Streams or Drexel's Kaltura, where you can add it to one or more Bb Learn course shells.
Add a title. Add a description is wish. Recommend adding tags that included the course this recording is for (if it's for a course), like CI-101, CS 283, INFO 400, etc.
See the webpage below for how to add your recording to Bb Learn
Ignore errors that save low on disk space, but note that some applications may not run
If you run into some issue with uploading your recording, or with making your recording, using Kaltura Capture, here's how you often can find the recording video file or files stored locally on your own computer.
On a Mac:
- Open up a Finder window (any window showing files or folders).
- Click "Go" menu.
- Click "Connect to Server."
- Copy or type in the following in the "Go to the folder" window.
~/Library/Preferences/Kaltura/Capture/Recordings - Click "Go."
- Look for your video recording.
C:\Users\[computer_username]\AppData\Local\Kaltura\Capture\Recordings\
Low Volume/Hard-to-hear Audio?
If you are having trouble hearing a professor due to low audio, or bad audio, one possible work-around solution to try is to download/install the Chrome web browser and install the "Volume Master" extension from the Chrome Web Store at the link below.
We cannot find a similar link for Firefox as of yet. The above link has a good chance of working for other Chrome-based web browsers, such as the new Microsoft Edge and the Brave web browser, as well, which may be less resource intensive on your computer.