
Turnitin Direct -- Creating and Modifying
Creating a Turnitin Assignment in Bb Learn
- Go to Week or other content area in Bb Learn course section.
Any content area with a Build Content drop-down menu will work.
Click Build Content > Turnitin Assignments.
- Copy an assignment from an old course section.
Or create a new assignment.
Note: you might only get the copy assignments option once before creating a new assignment.
- Enter Title, Instructions, Max Grade, Start Date, Due Date, Feedback Release Date.
Title is the name of the assignment.
Instructions are just that.
Max Grade is the same as Points Possible in Bb Learn.
Start Date is when the assignment submission link and description become visible to the student.
Due Date is just that.
Feedback Release Date is when your grades and comments become visible to students. - Click Submit to save changes.
- The new Turnitin assignment will be created.
Notes on Due Dates
You must have a Due Date for a Turnitin assignment.
You cannot remove the Due Date in Bb Learn for a Turnitin assignment once it is set.
You might uncheck or clear the Due Date area in Bb Learn, and click "Submit," but your changes will not be saved, and the previously set Due Date and Time are still set, and will appear again when you go to Edit the Settings.
List in the Description if there is no Due Date, and set the Due Date for the end of the quarter (right before Finals Week, or end of Finals Week, or what you will).
Instructions: Edit Due Date, Title or Description
After creating the Turnitin assignment, here is how to edit the Due Date, Title, and Description.
- Click the circled down arrow next to the Turnitin assignment.
Click Edit.
- Edit Title.
Edit Due Date.
Edit Description (scroll down for that).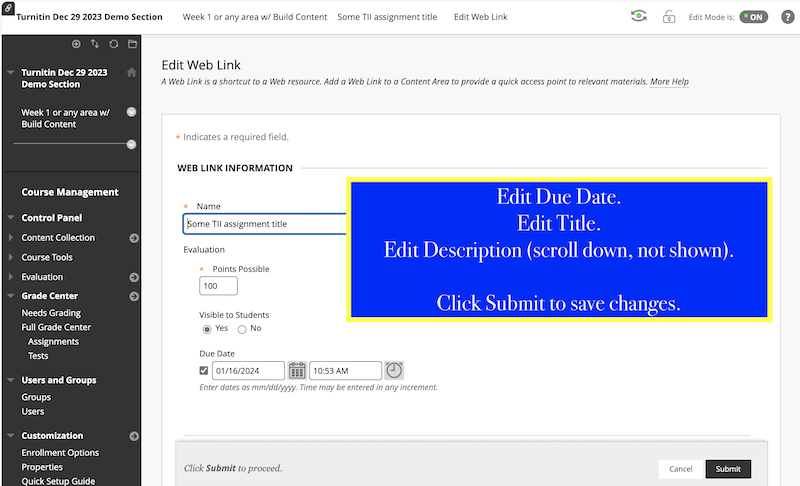
- RECOMMEND NEXT SECTION to change if Visible to Students or not.
- Click Submit to save changes.
Edit Display After or Availability Date
After creating the Turnitin assignment, here is how to edit the Display After or Availability Date.
This is when students can see the Turnitin assignment submission link.
- Click circled down arrow.
Click Adaptive Release.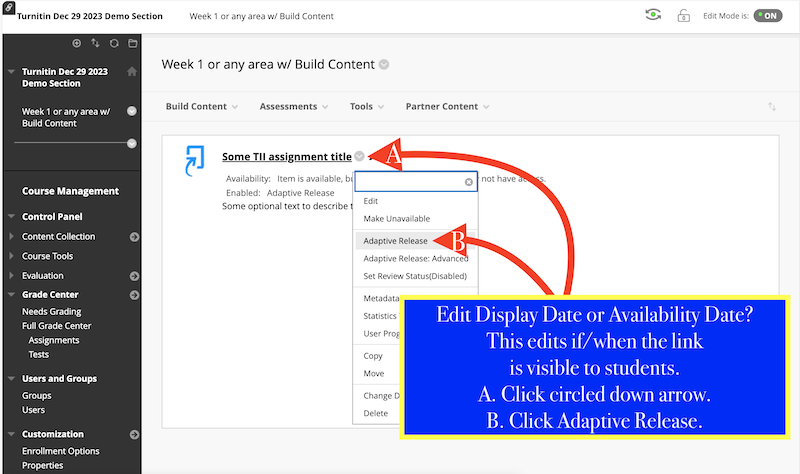
- Scroll down to Date.
Check Display After.
Change the date and time.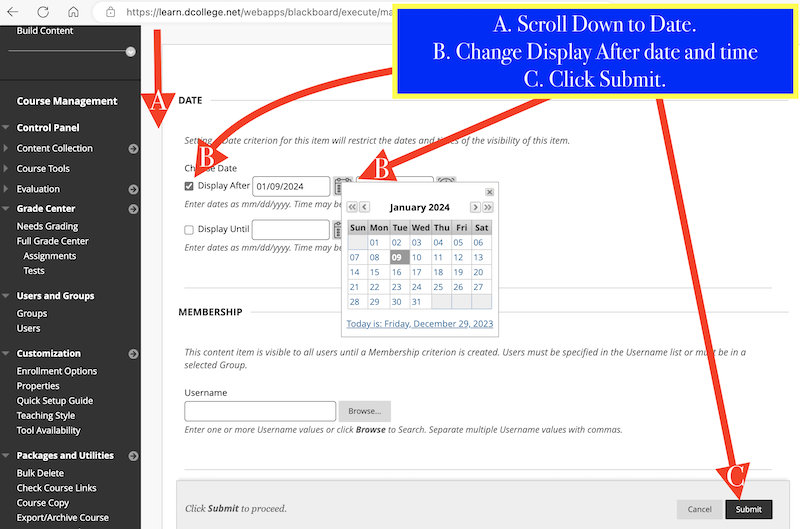
- Click Submit to save changes.
How Students Submit
Assignment Inbox and Analytics
After creating the Turnitin assignment, here is how to get to the Assignment Inbox and Analytics for the assignment, as well as other Turnitin settings such as Max Grade, Feedback, and Optional Settings.
- Click the link for the Turnitin assignment.
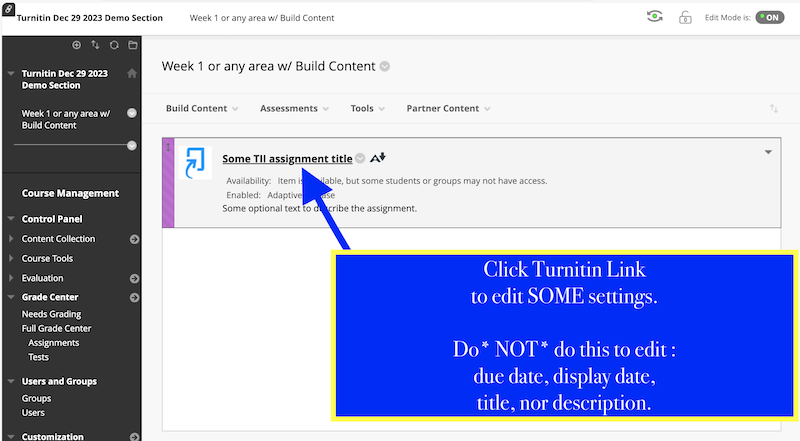
- Options are shown.
Assignment Inbox is where you can view & grade student submissions.
Analytics is where you can view analytics on submissions.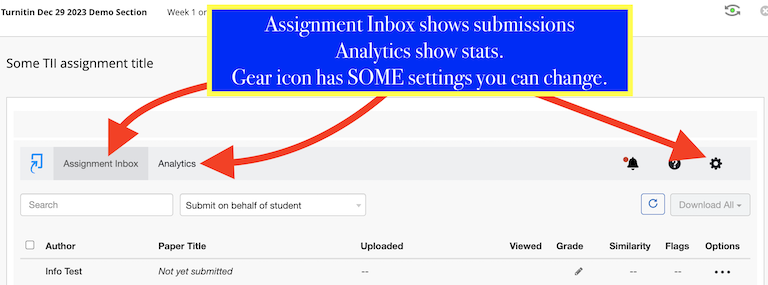
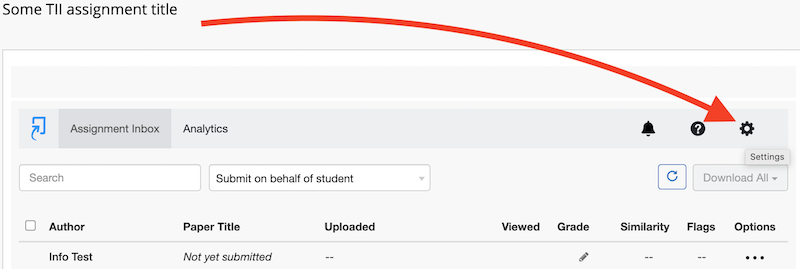
- Gear icon is where you can find some Turnitin settings.
Some settings cannot be changed here. SEE OTHER SECTIONS on this page.
Grading Note
When you grade, Turnitin will open the document in a new window.
After grading a paper, and you submit your changes or grade or comments...
WAIT 3-5 seconds or so to GIVE TIME for the TURNITIN DOCUMENT for 1 student's paper TO RELOAD & SAVE CHANGES TO BB LEARN & TURNITIN!
If you don't see grade changes go to Bb Learn for a paper, go back and slightly modify your grade or comments in the Turnitin document, and allow for the above to happen, so the changes go to Bb Learn
Optional Settings
After creating the Turnitin assignment, here is how to:
- change Max Grade (points possible)
- Feedback Release date (when grades and comments are visible to students.
- allow late submissions,
- allow any file type (plagiarism detection or similarity report only used with some file types),
- change how much of a match to a source is flagged,
- exclude bibliographic areas,
- Click the link for the Turnitin assignment.
- Click the gear icon.
- You can Allow late submissions.
You can Allow submissions of any file type.
That may disrupt the ability for Turnitin to do plagiarism detection.
Click ? icon to see which file types use plagiarism detection (also called the similarity report).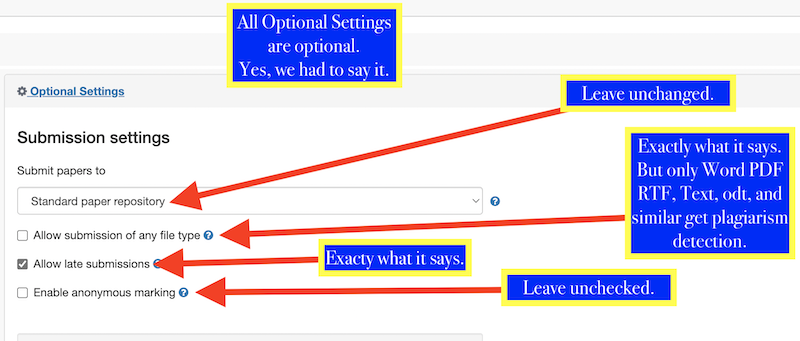
- Leave Grammar Settings on default.
- Attach a rubric. Click ? icon for more info. NOT the same rubrics as used in Bb Learn.
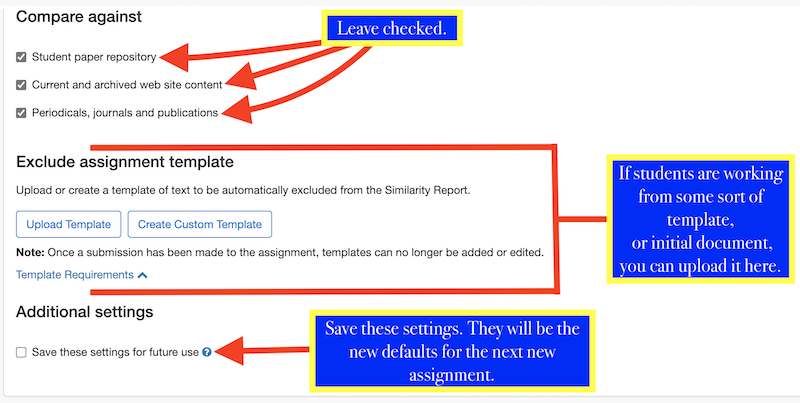
- Change settings for Similarity Report (plagiarism detection).
See screenshot below for more info.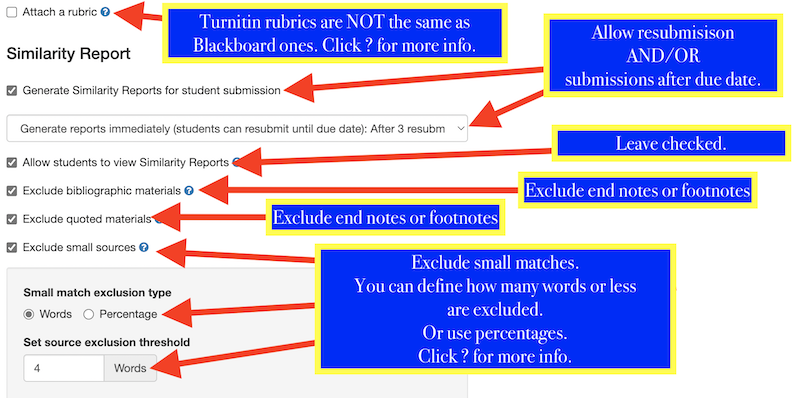
- Upload an assignment template, if the assignment has everyone filling out the same document.
- Save settings for the future if you wish these to be the default settings when you create a new Turnitin assignment.
- Click Submit to save changes.