
BeyondTrust Bomgar Setup For End User on Mac
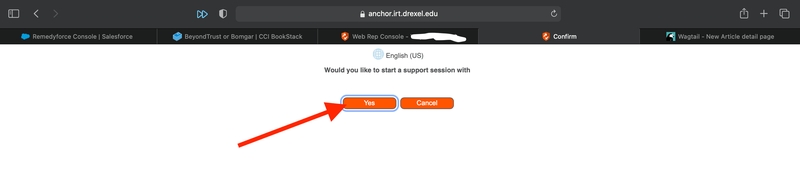
- Click on the Bomgar join session link.
Bomgar join session link will look like this - https://anchor.irt.drexel.edu/?ak=4d*****d3 - You will see new tab saying "Would you like to start a support session with XXX?". Click "Yes".
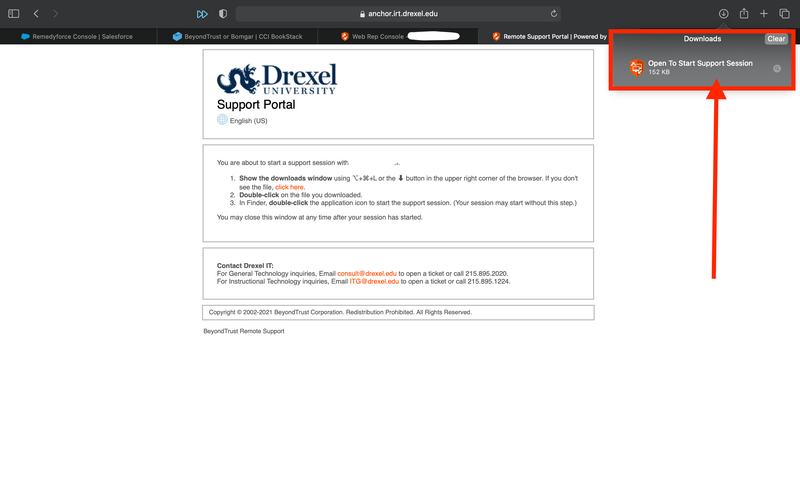
- It will automatically download Bomgar application.
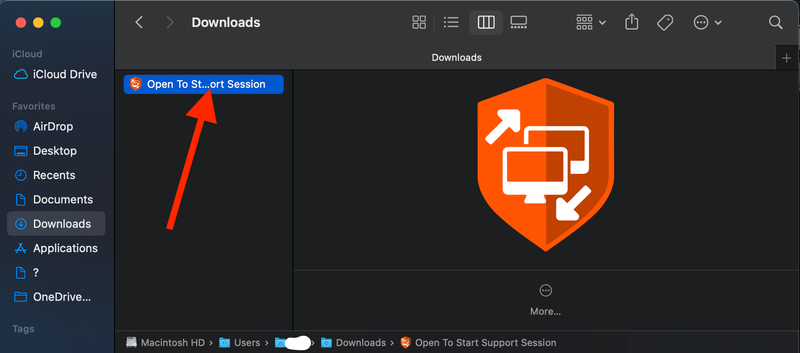
- Go to Finder and download folder. Double click on the "Open to Start Support Session".
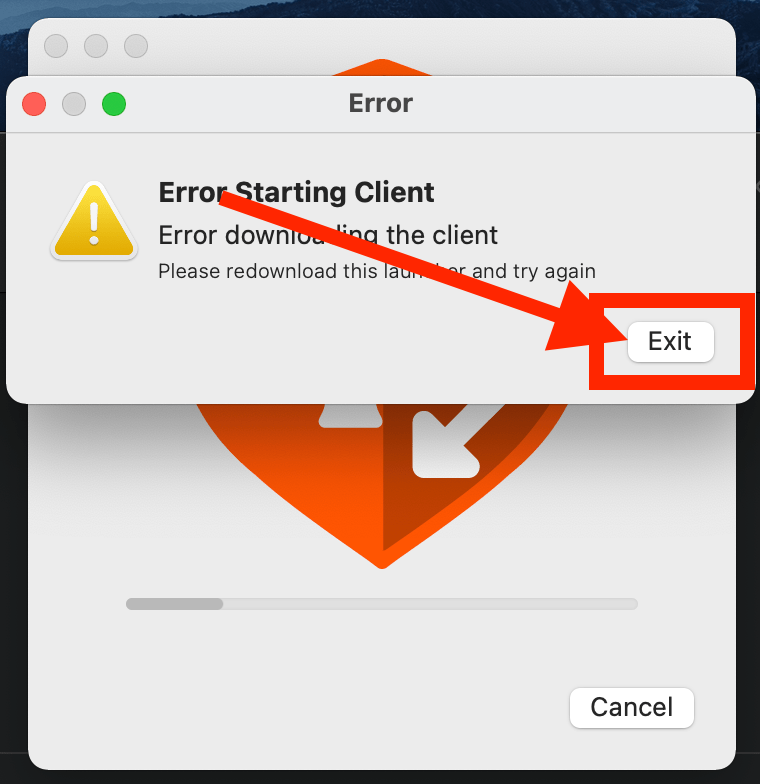
- If you get an error saying "Error starting client", Click "Exit". Re-do step 1 to 4.
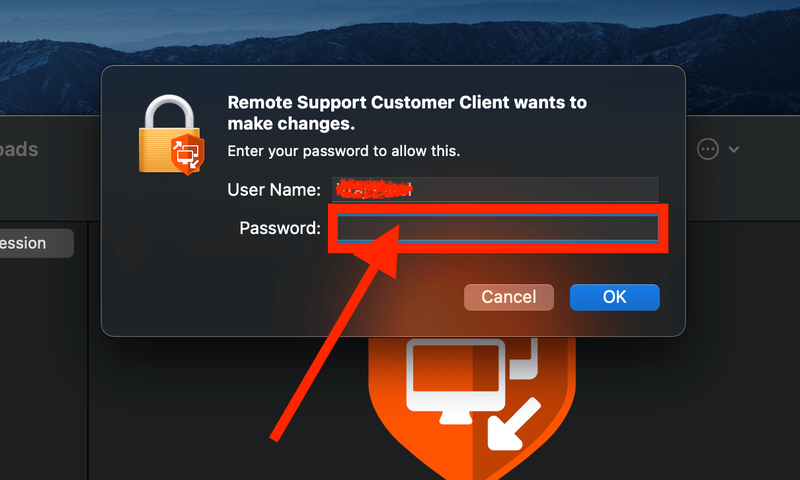
- Enter you Mac user account password and it will install Bomgar service client on your Mac automatically.
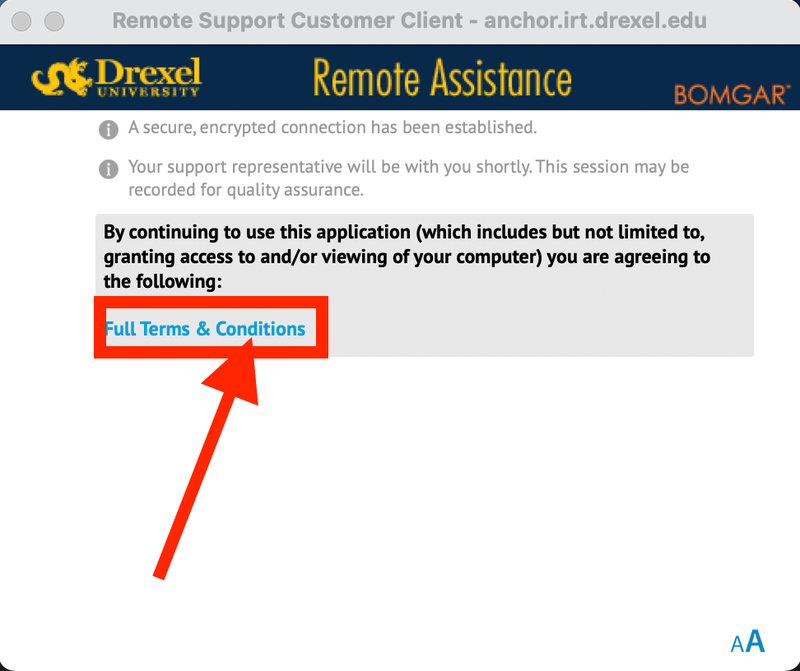
- It will automatically open Bomgar on your Mac. Click on "Full terms and conditions" and accept it.
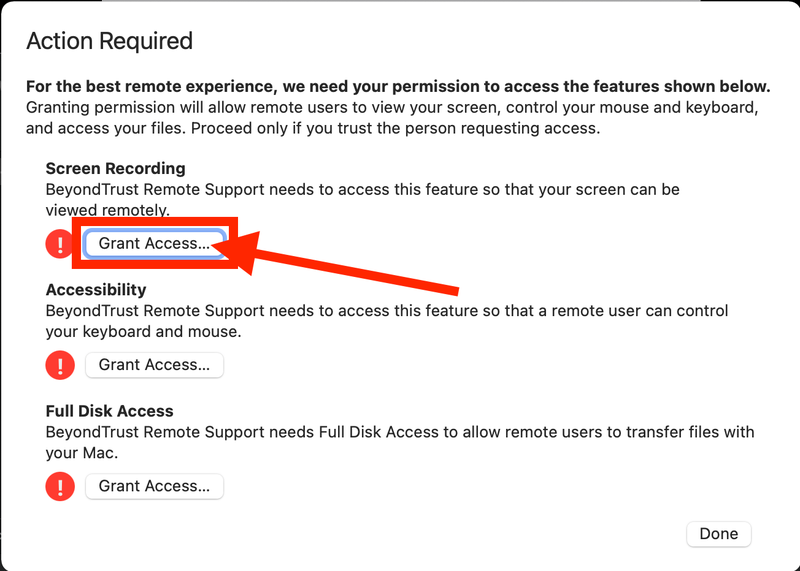
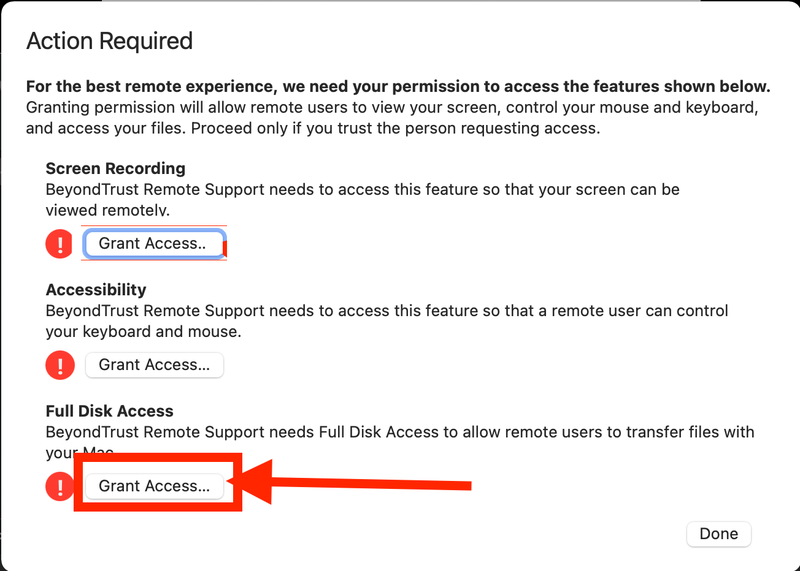
- You need to grant some access permissions to Bomgar client. You'll see pop-up screen asking for "Screen Recording". "Accessibility" and "Full Disk Access". Click on "Grant Access" user Screen Recording section.
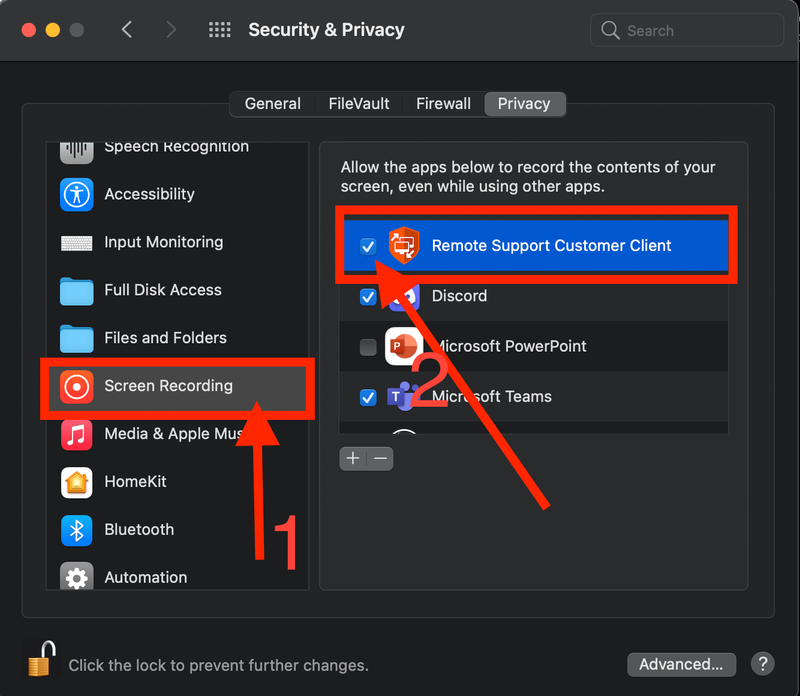
- It will open Security & Privacy. Click on little lock on icon from bottom left of Security & Privacy screen. Enter you Mac user account password when prompted.

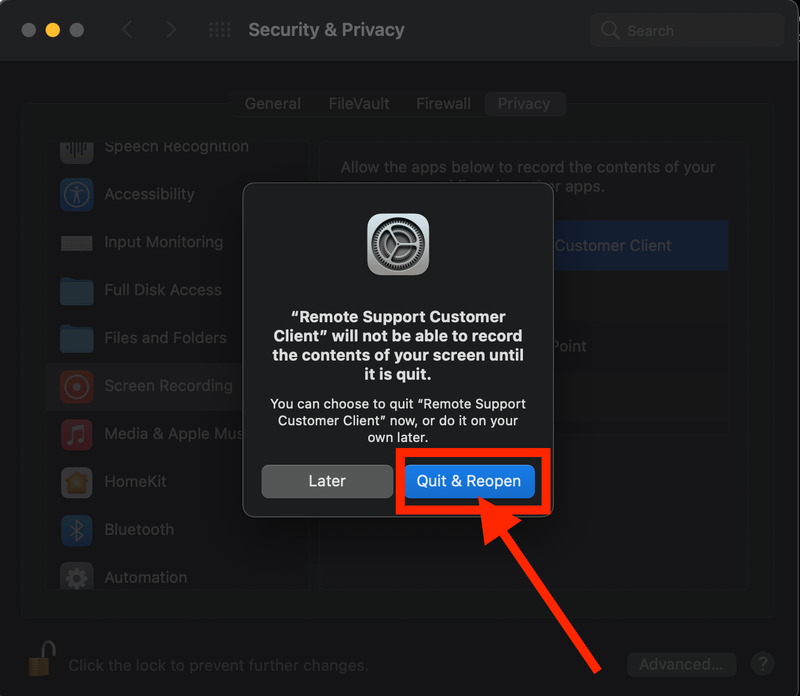
- Check the "Remote Support Customer Client" under Screen Recording.
-- If you can't find "Remote Support Customer Client" under Screen Recording, see Mac -- How to manually add Bomgar to Security & Privacy to grant Access. Please re-do step 9 after manually adding "Remote Support Customer Client". - It will ask to Quit & Reopen Bomgar. Click on "Quit & Reopen".
- Click on "Grant access" under Full Disk Access section.
- Check the "Remote Support Customer Client" under Full Disk Access.
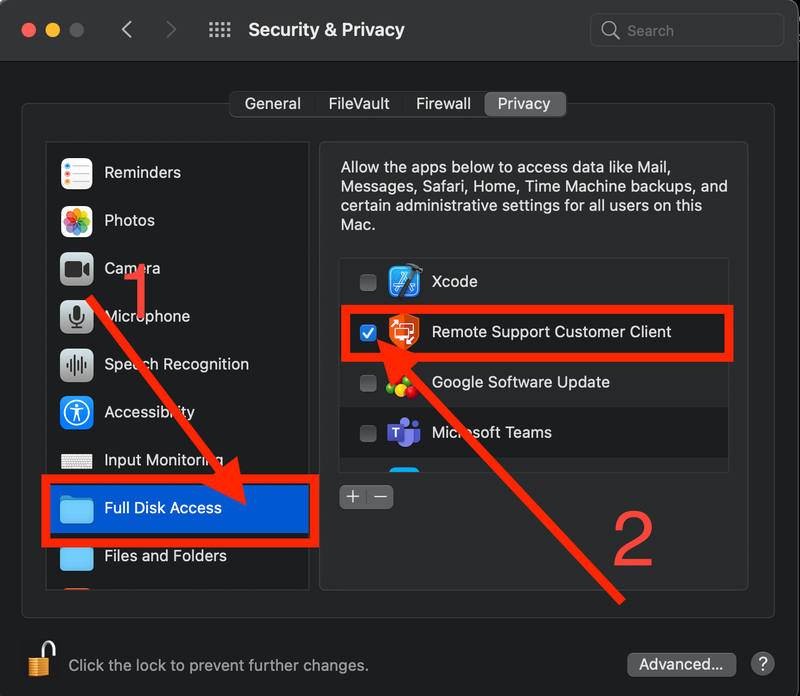
-- If you can't find "Remote Support Customer Client" under Full Disk Access, see Mac -- How to manually add Bomgar to Security & Privacy to grant Access. Please re-do step 12 after manually adding "Remote Support Customer Client". - It will ask to Quit & Reopen Bomgar. Click on "Quit & Reopen".
- Click on "Grant access" under Accessibility.
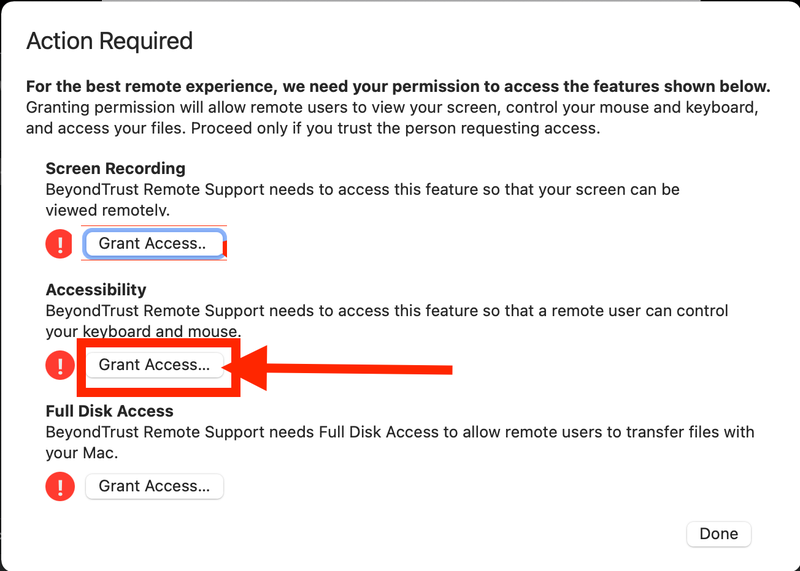
- Check the "Remote Support Customer Client" under Accessibility.
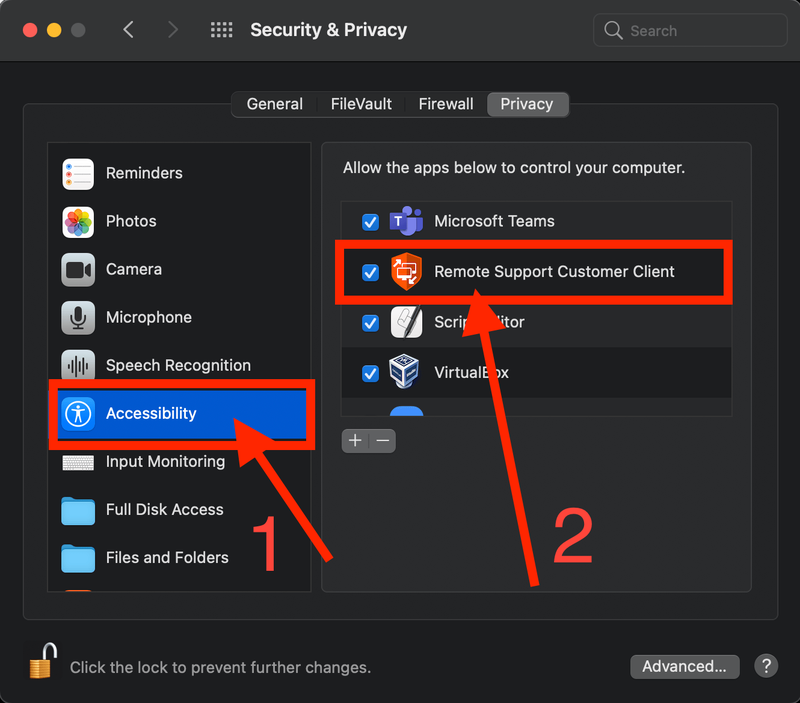
-- If you can't find "Remote Support Customer Client" under Accessibility, see Mac -- How to manually add Bomgar to Security & Privacy to grant Access. Please re-do step 15 after manually adding "Remote Support Customer Client". - Click on little lock icon from bottom left to save all the settings.
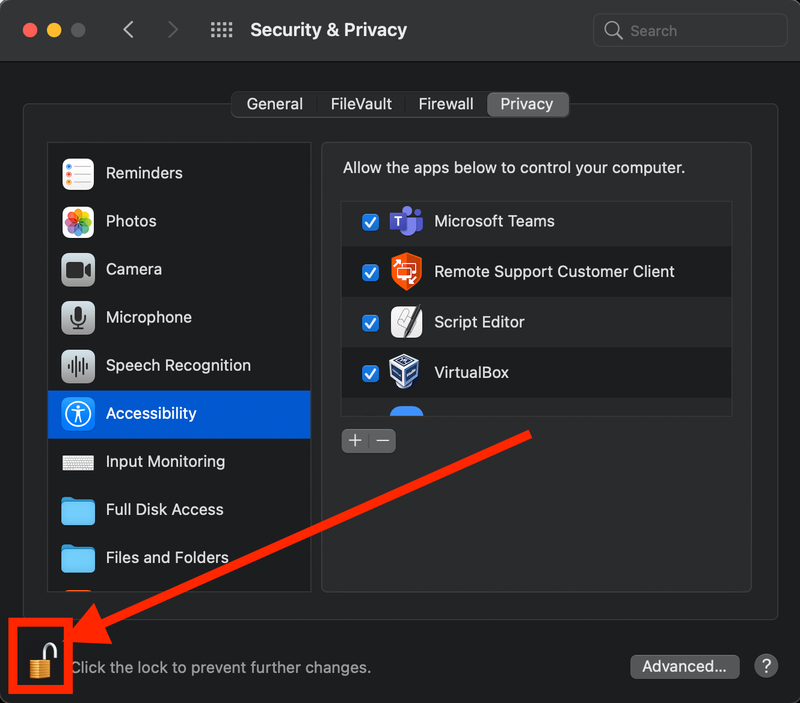
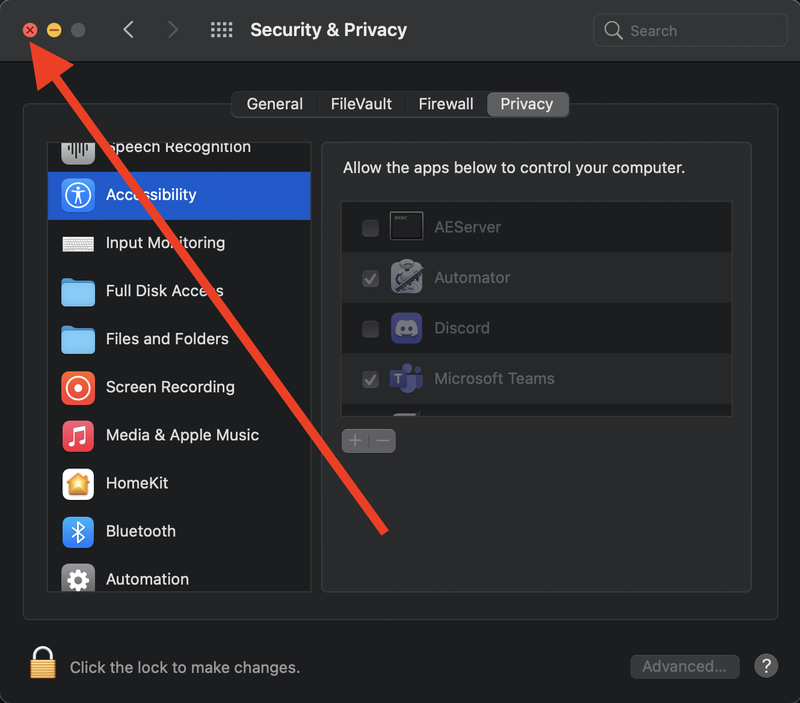
- Close "Security & Privacy" window by clicking quit button from top left.
- You are all set with Bomgar.
If you are having difficulty or need help performing any of the steps above, please reach out to ihelp@drexel.edu for assistance.